Crayon and Embroidery BOM Month 1
Thought I might use this spot to highlight a fun Block of the Month I am teaching at The Quilting Quarters. I will update it each month with tips and pictures-promise!
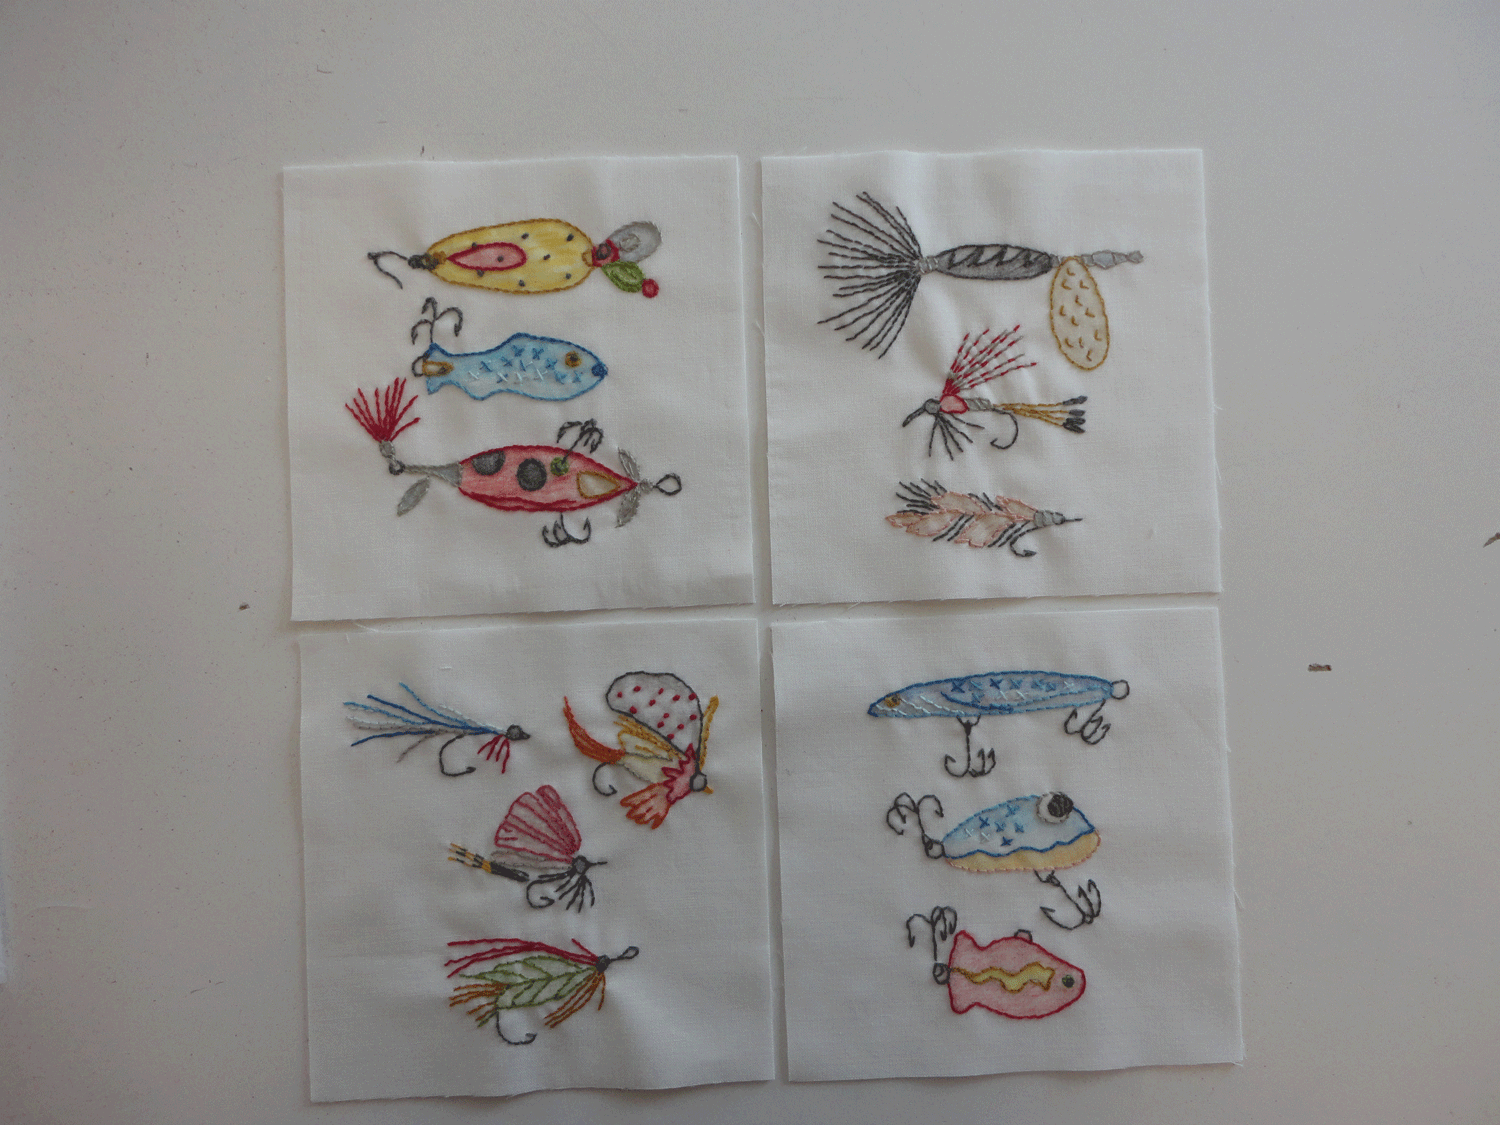
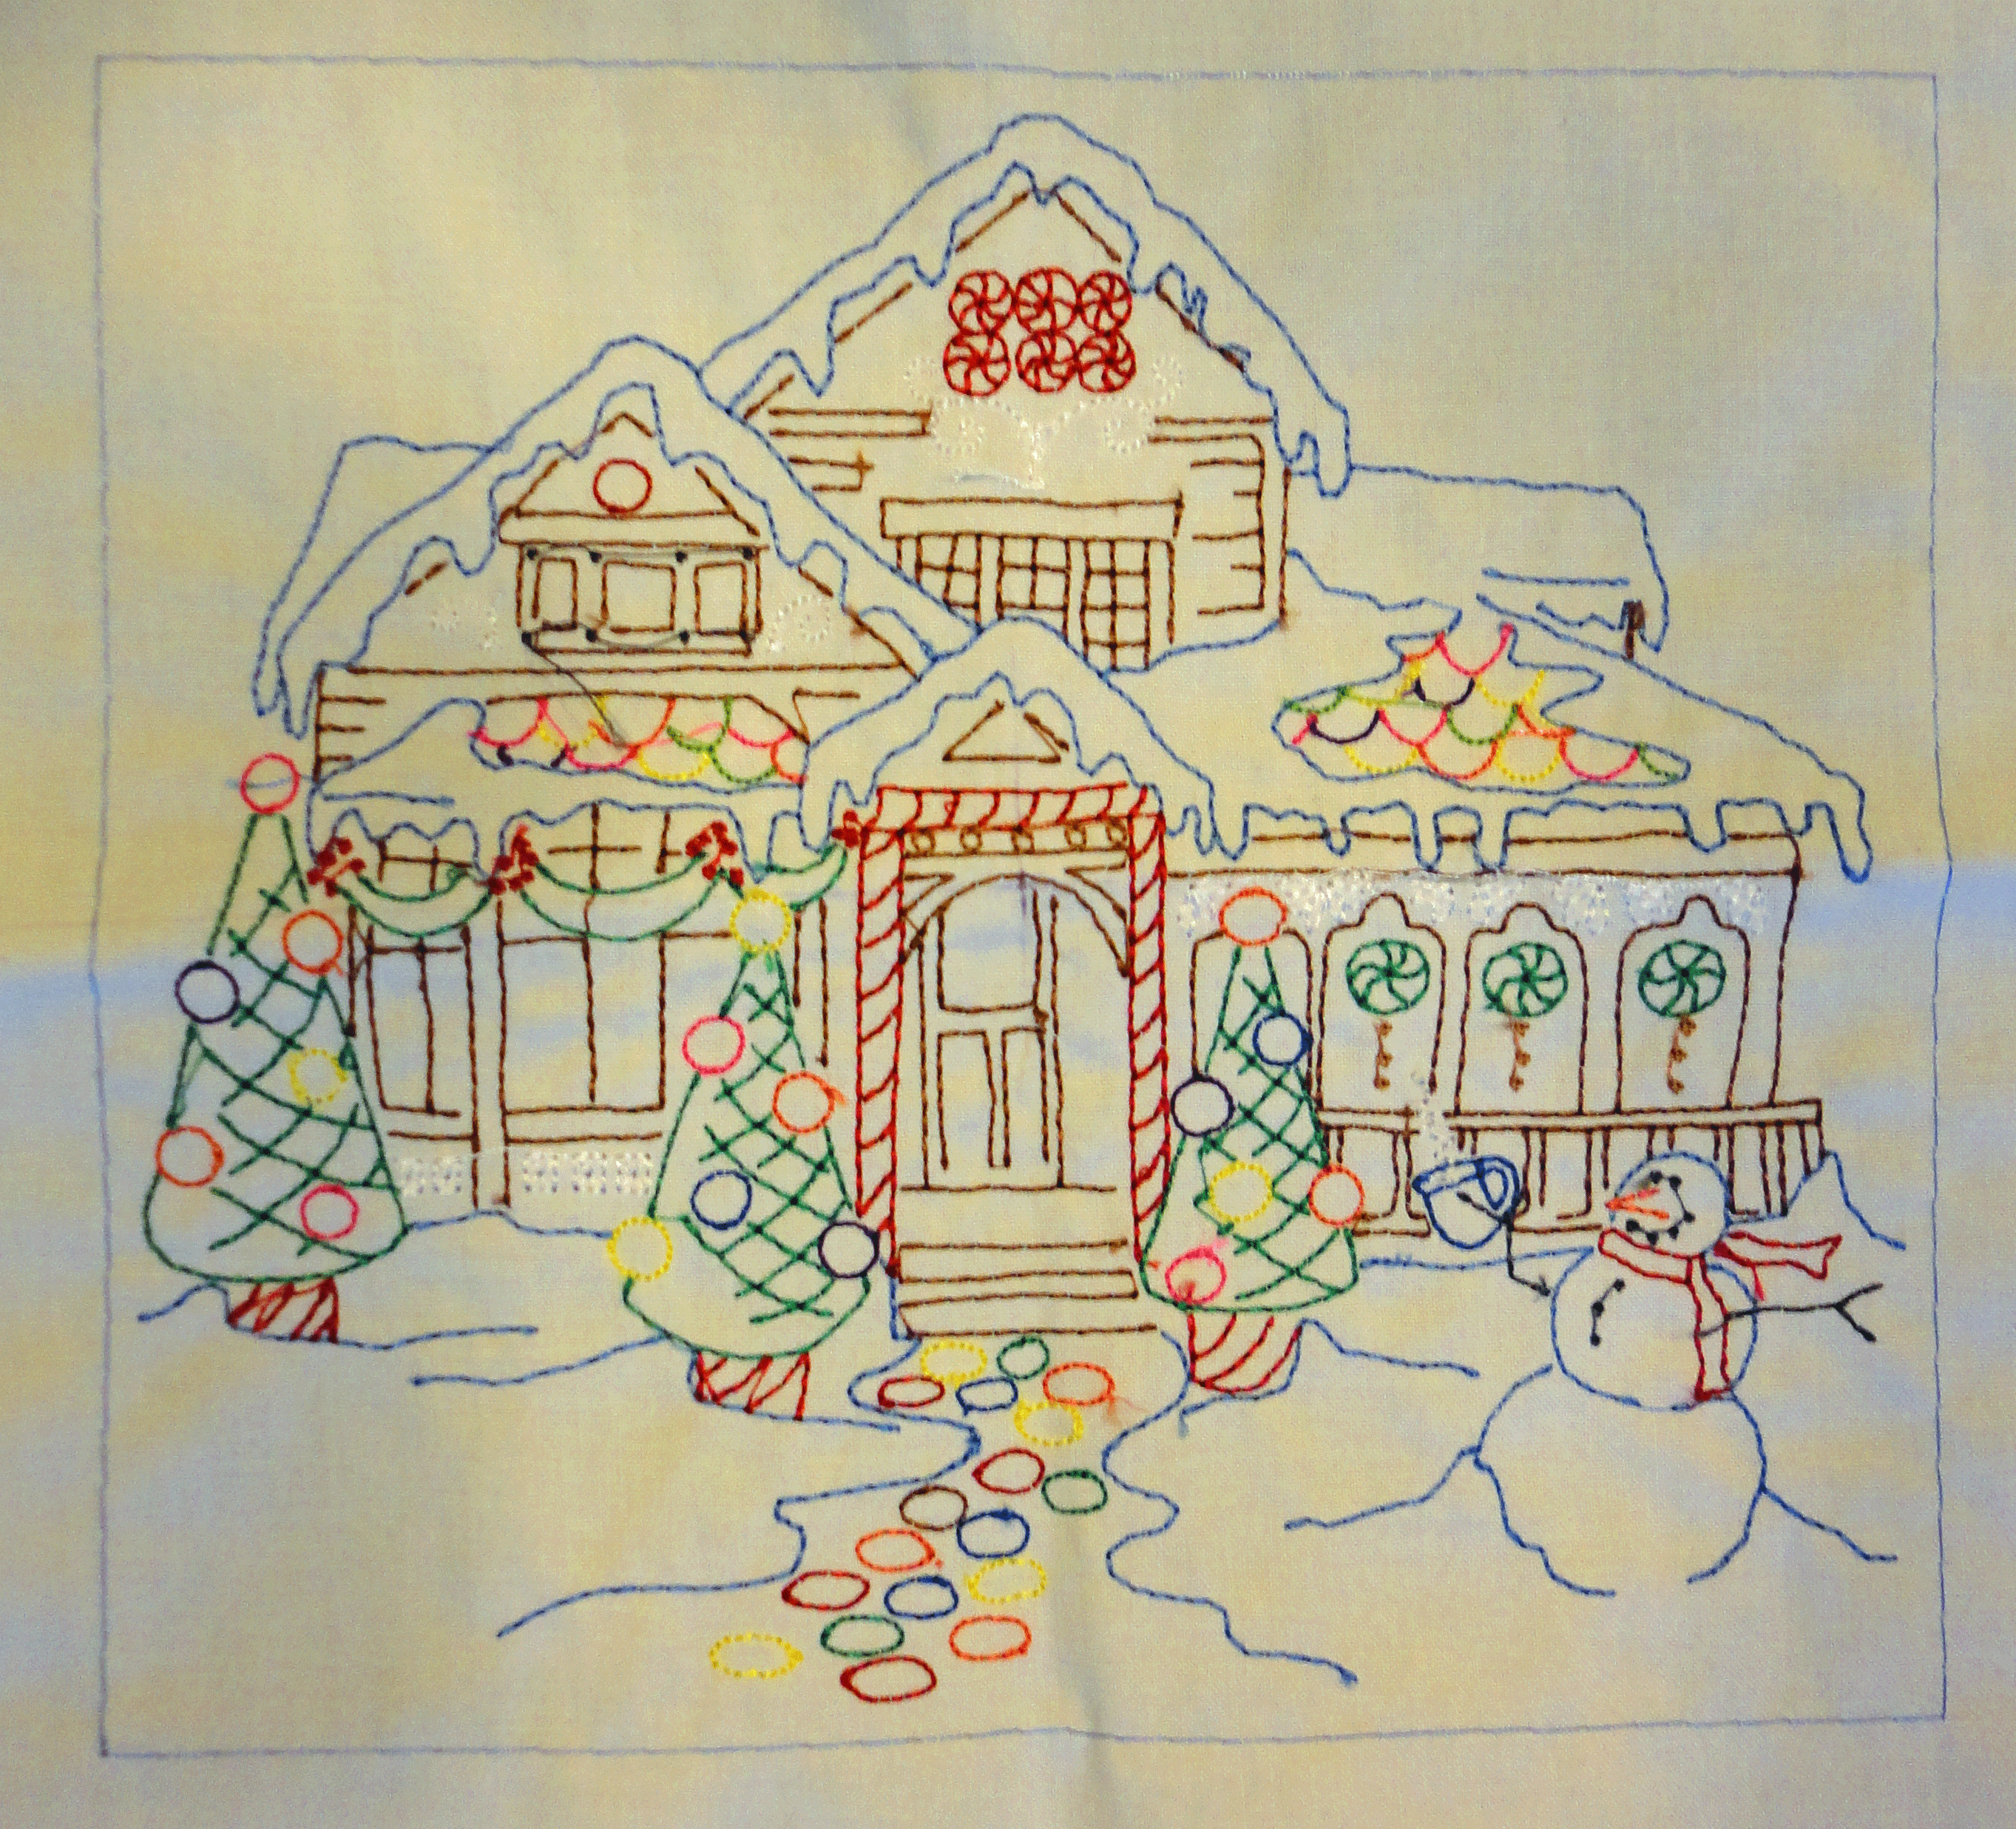
We’re working on Crabapple Hill’s Hook Line and Sinker and Gingerbread Square. I am cheating on the Gingerbread Square quilt as a fellow quilter is embroidering the blocks on her machine (yes there’s a program available!), but it gives me a chance to experiment a bit.
I found some great crayon tutorials on the web, including:
Sew Mod crayon embroidery and Urban Threads Crayon Tinting
I think part of the trick is to decide how much color you want to have in the final piece. I’ve had to play a bit with that and am still deciding what effect I like better.
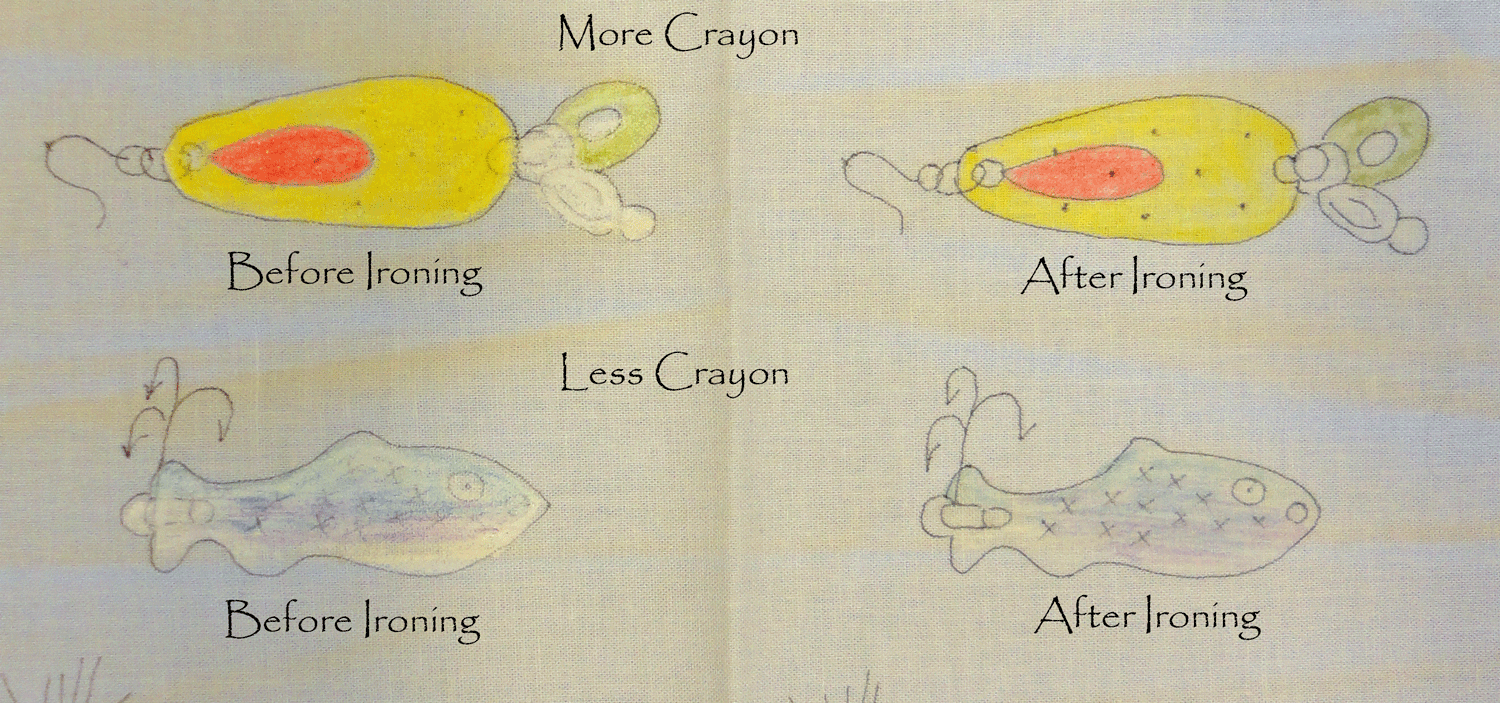
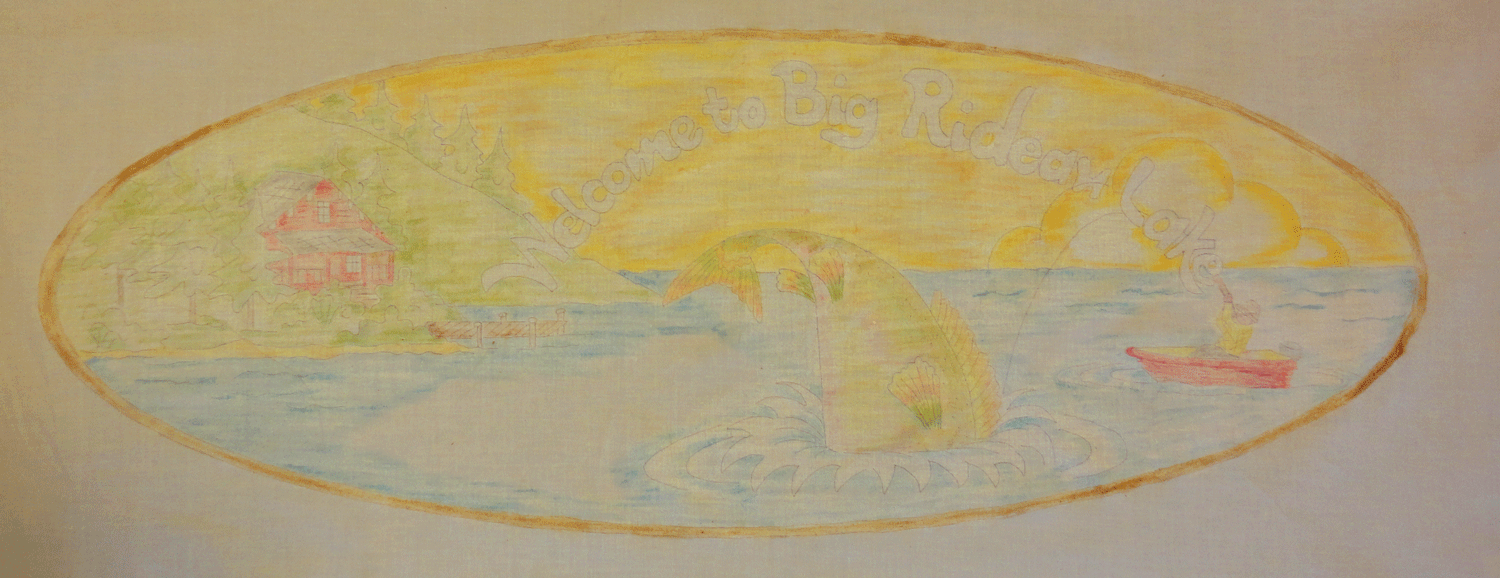
After my first pass with the iron, I went back and added a little more color to fill in the water. Other than that I was pretty satisfied.

This is the same block but with more colored crayon. Still not sure what I like better
So, first month thoughts-
- ALWAYS READ THE INSTRUCTIONS BEFORE STARTING. I jumped in, copied the design on my fabric and started coloring.
- Trying to pick crayon colors was hard work-except the Crabapple Hill folks had already done it and if I had looked they had provided a great guide!
- You don’t need a really heavy white base, just enough to cover is enough. I probably used a whole crayon on a 4″ square piece of fabric. Not required-the fabric doesn’t have to stand up on it’s own! Save time and crayons and just make sure there is an even light coverage in the area you want to color.
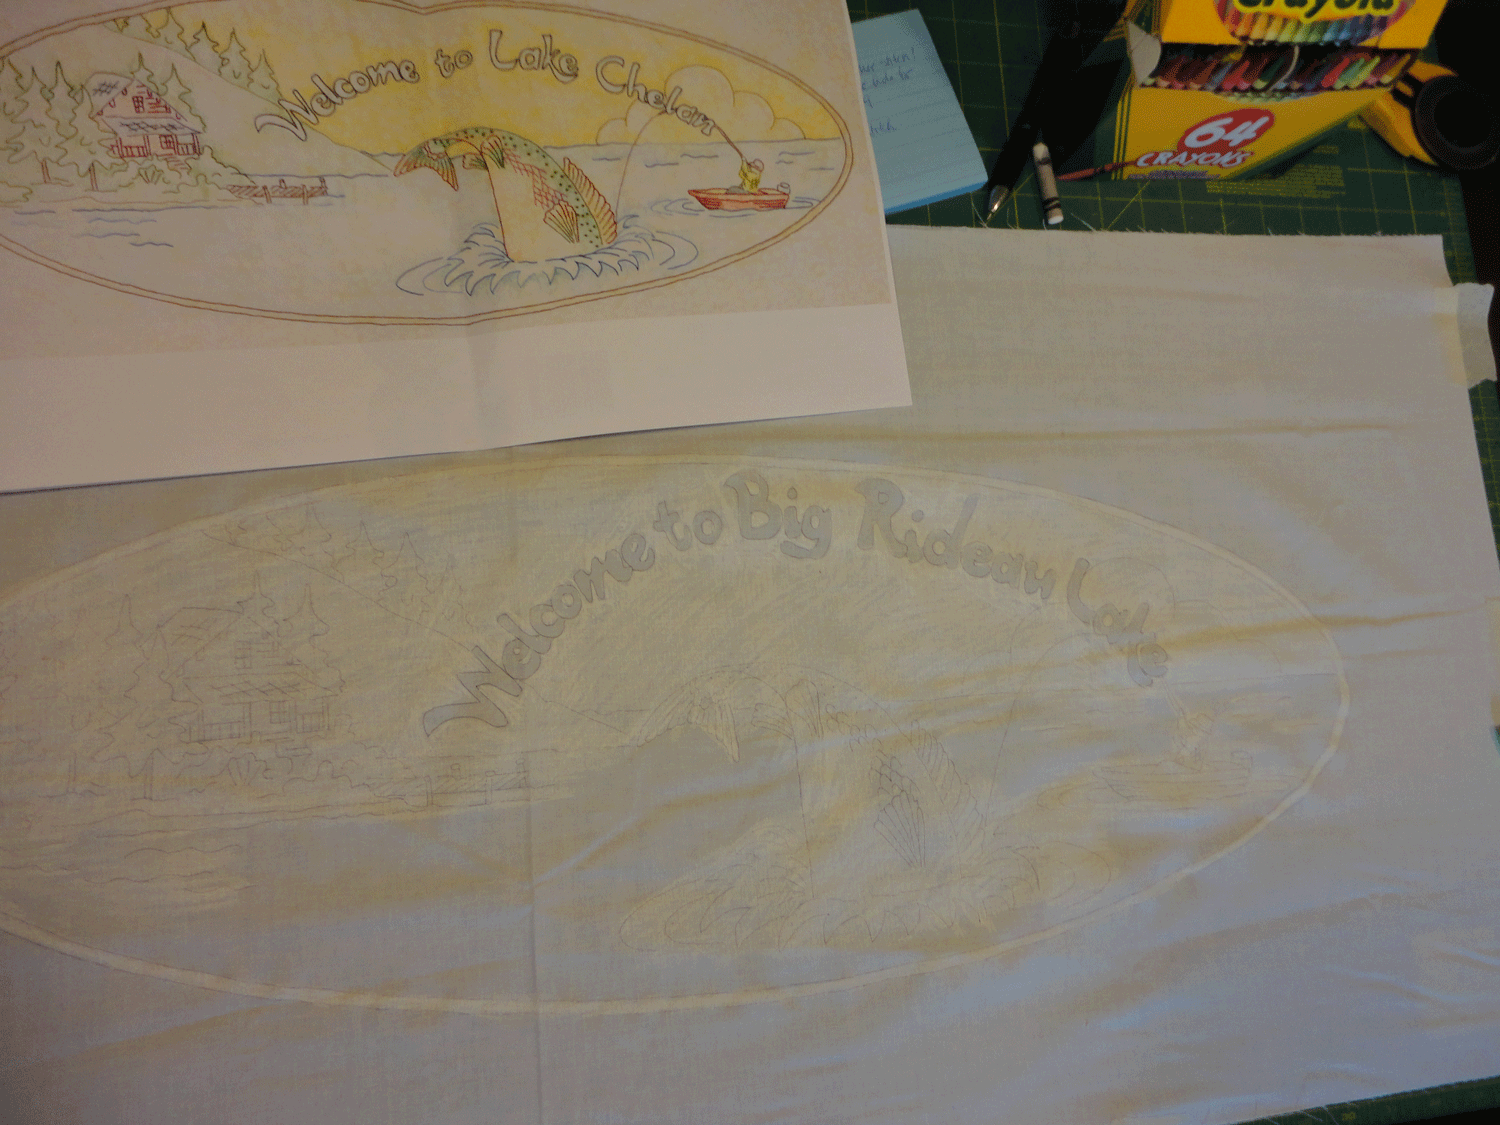
The white is a little heavy. When I redid the block (yes I made 2) I went a little lighter with the white, and smoother so that the crayon strokes weren’t as obvious. I also filled in some more of the foreground or water area and wasn’t careful about covering the lettering with the white
- Pick up the “bits” of crayon that end up on the fabric with masking tape. Straight down and up will grab them and not smush or spread them. Make sure to clean them up before you heat set.
- Did I mention “Read the pattern”? The instructions for thread color are detailed and really well presented. A joy to follow!
So here’s what we’ve done:
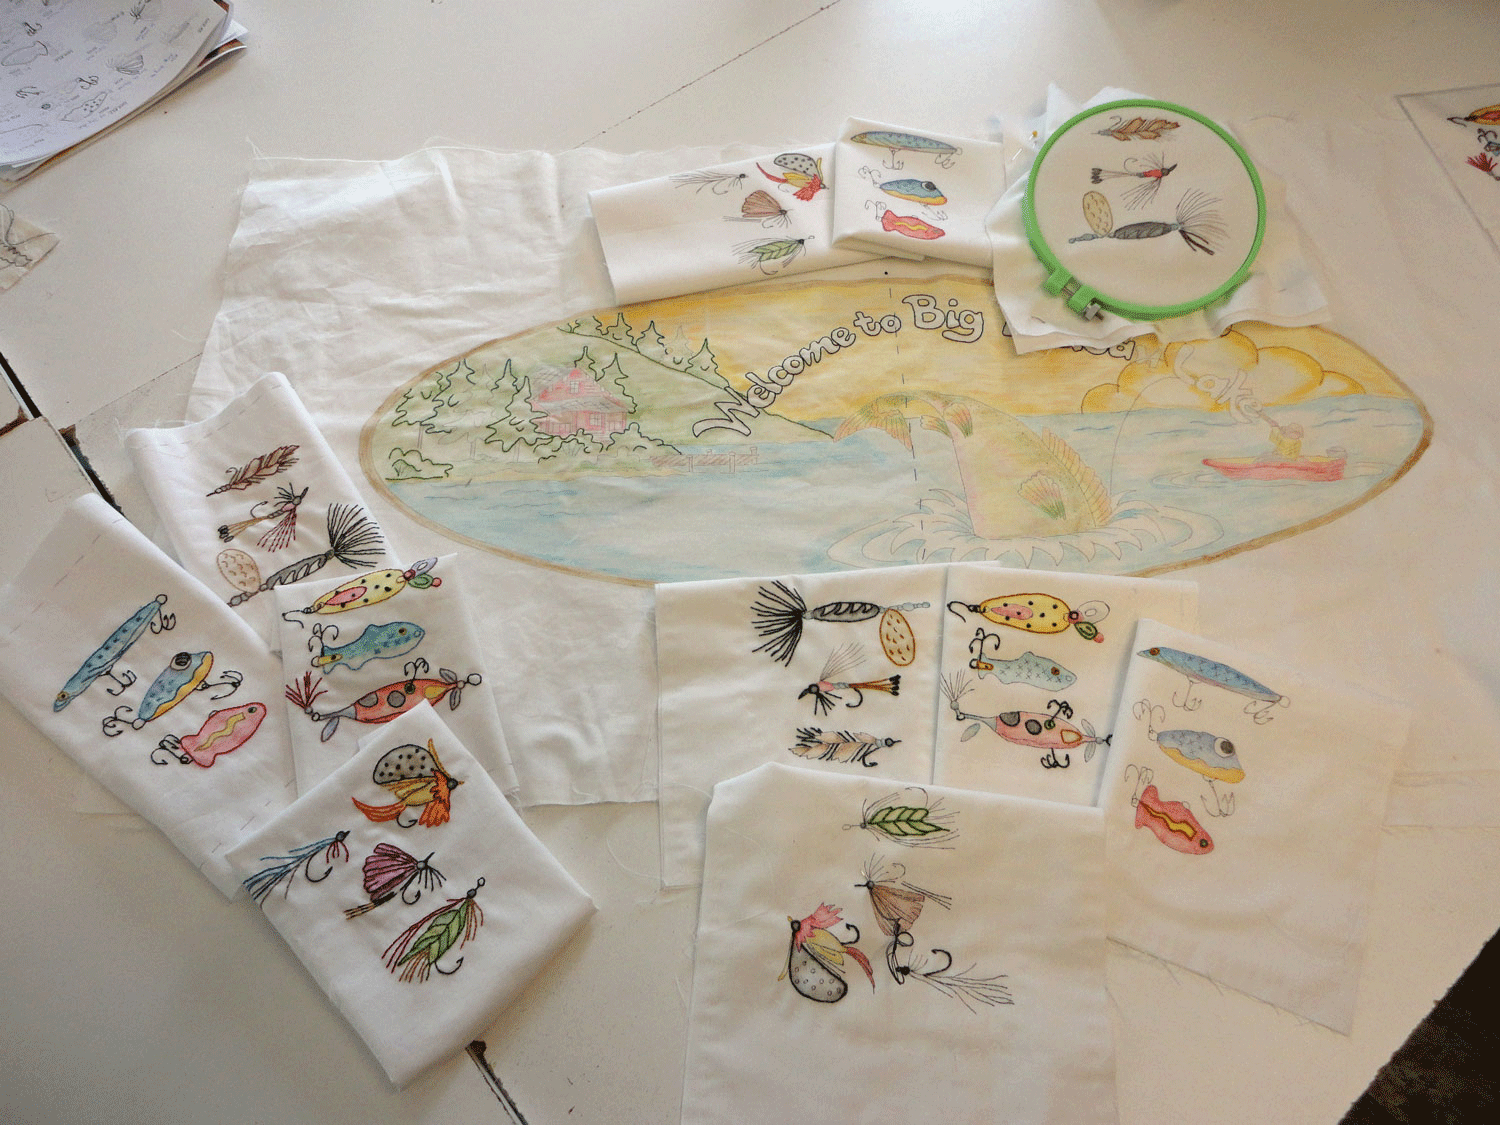
Block 1 (Lures) and Block 2 started. We are personalizing the names on the blocks
Hats off to Connie for an amazing job on Block 1!
 Just received my pre-embroidered Gingerbread Square block and am about to try coloring it, should be fun!
Hi! your blocks look great! Very good advice about picking up the bits of crayon with the masking tape. The first time I did crayon tinting I failed to remove all of them and ended up discarding an entire block because they were heat set on.
I look forward to seeing your progress and thanks so much for linking my tutorial!
Thanks for the comment Lorrie! The ladies in the group liked your information. I am having so much fun with this that I am working on a design for a BOM program for next year.