Stained Glass Quilting Tutorial
If you want to try this technique, contact me and I will happily send you a PDF file of the drawing!
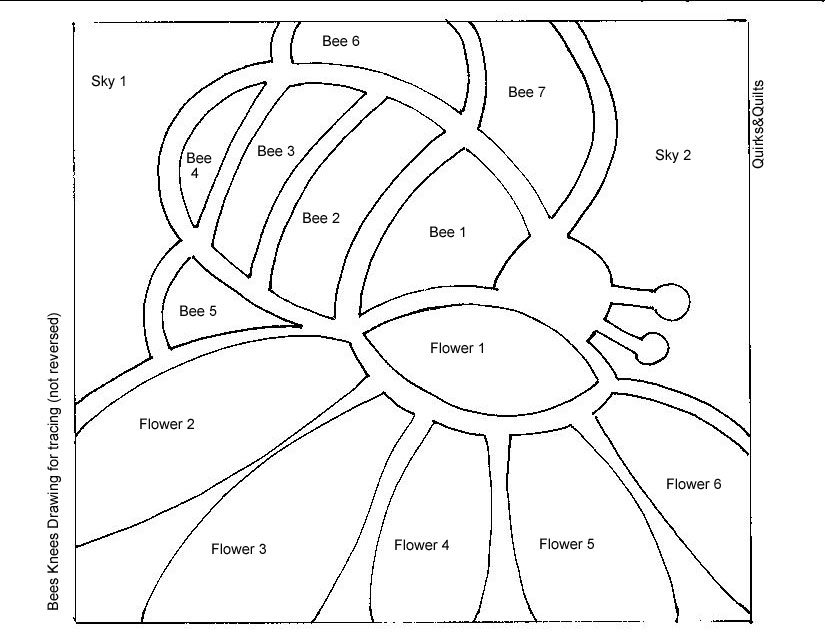
sample of drawing
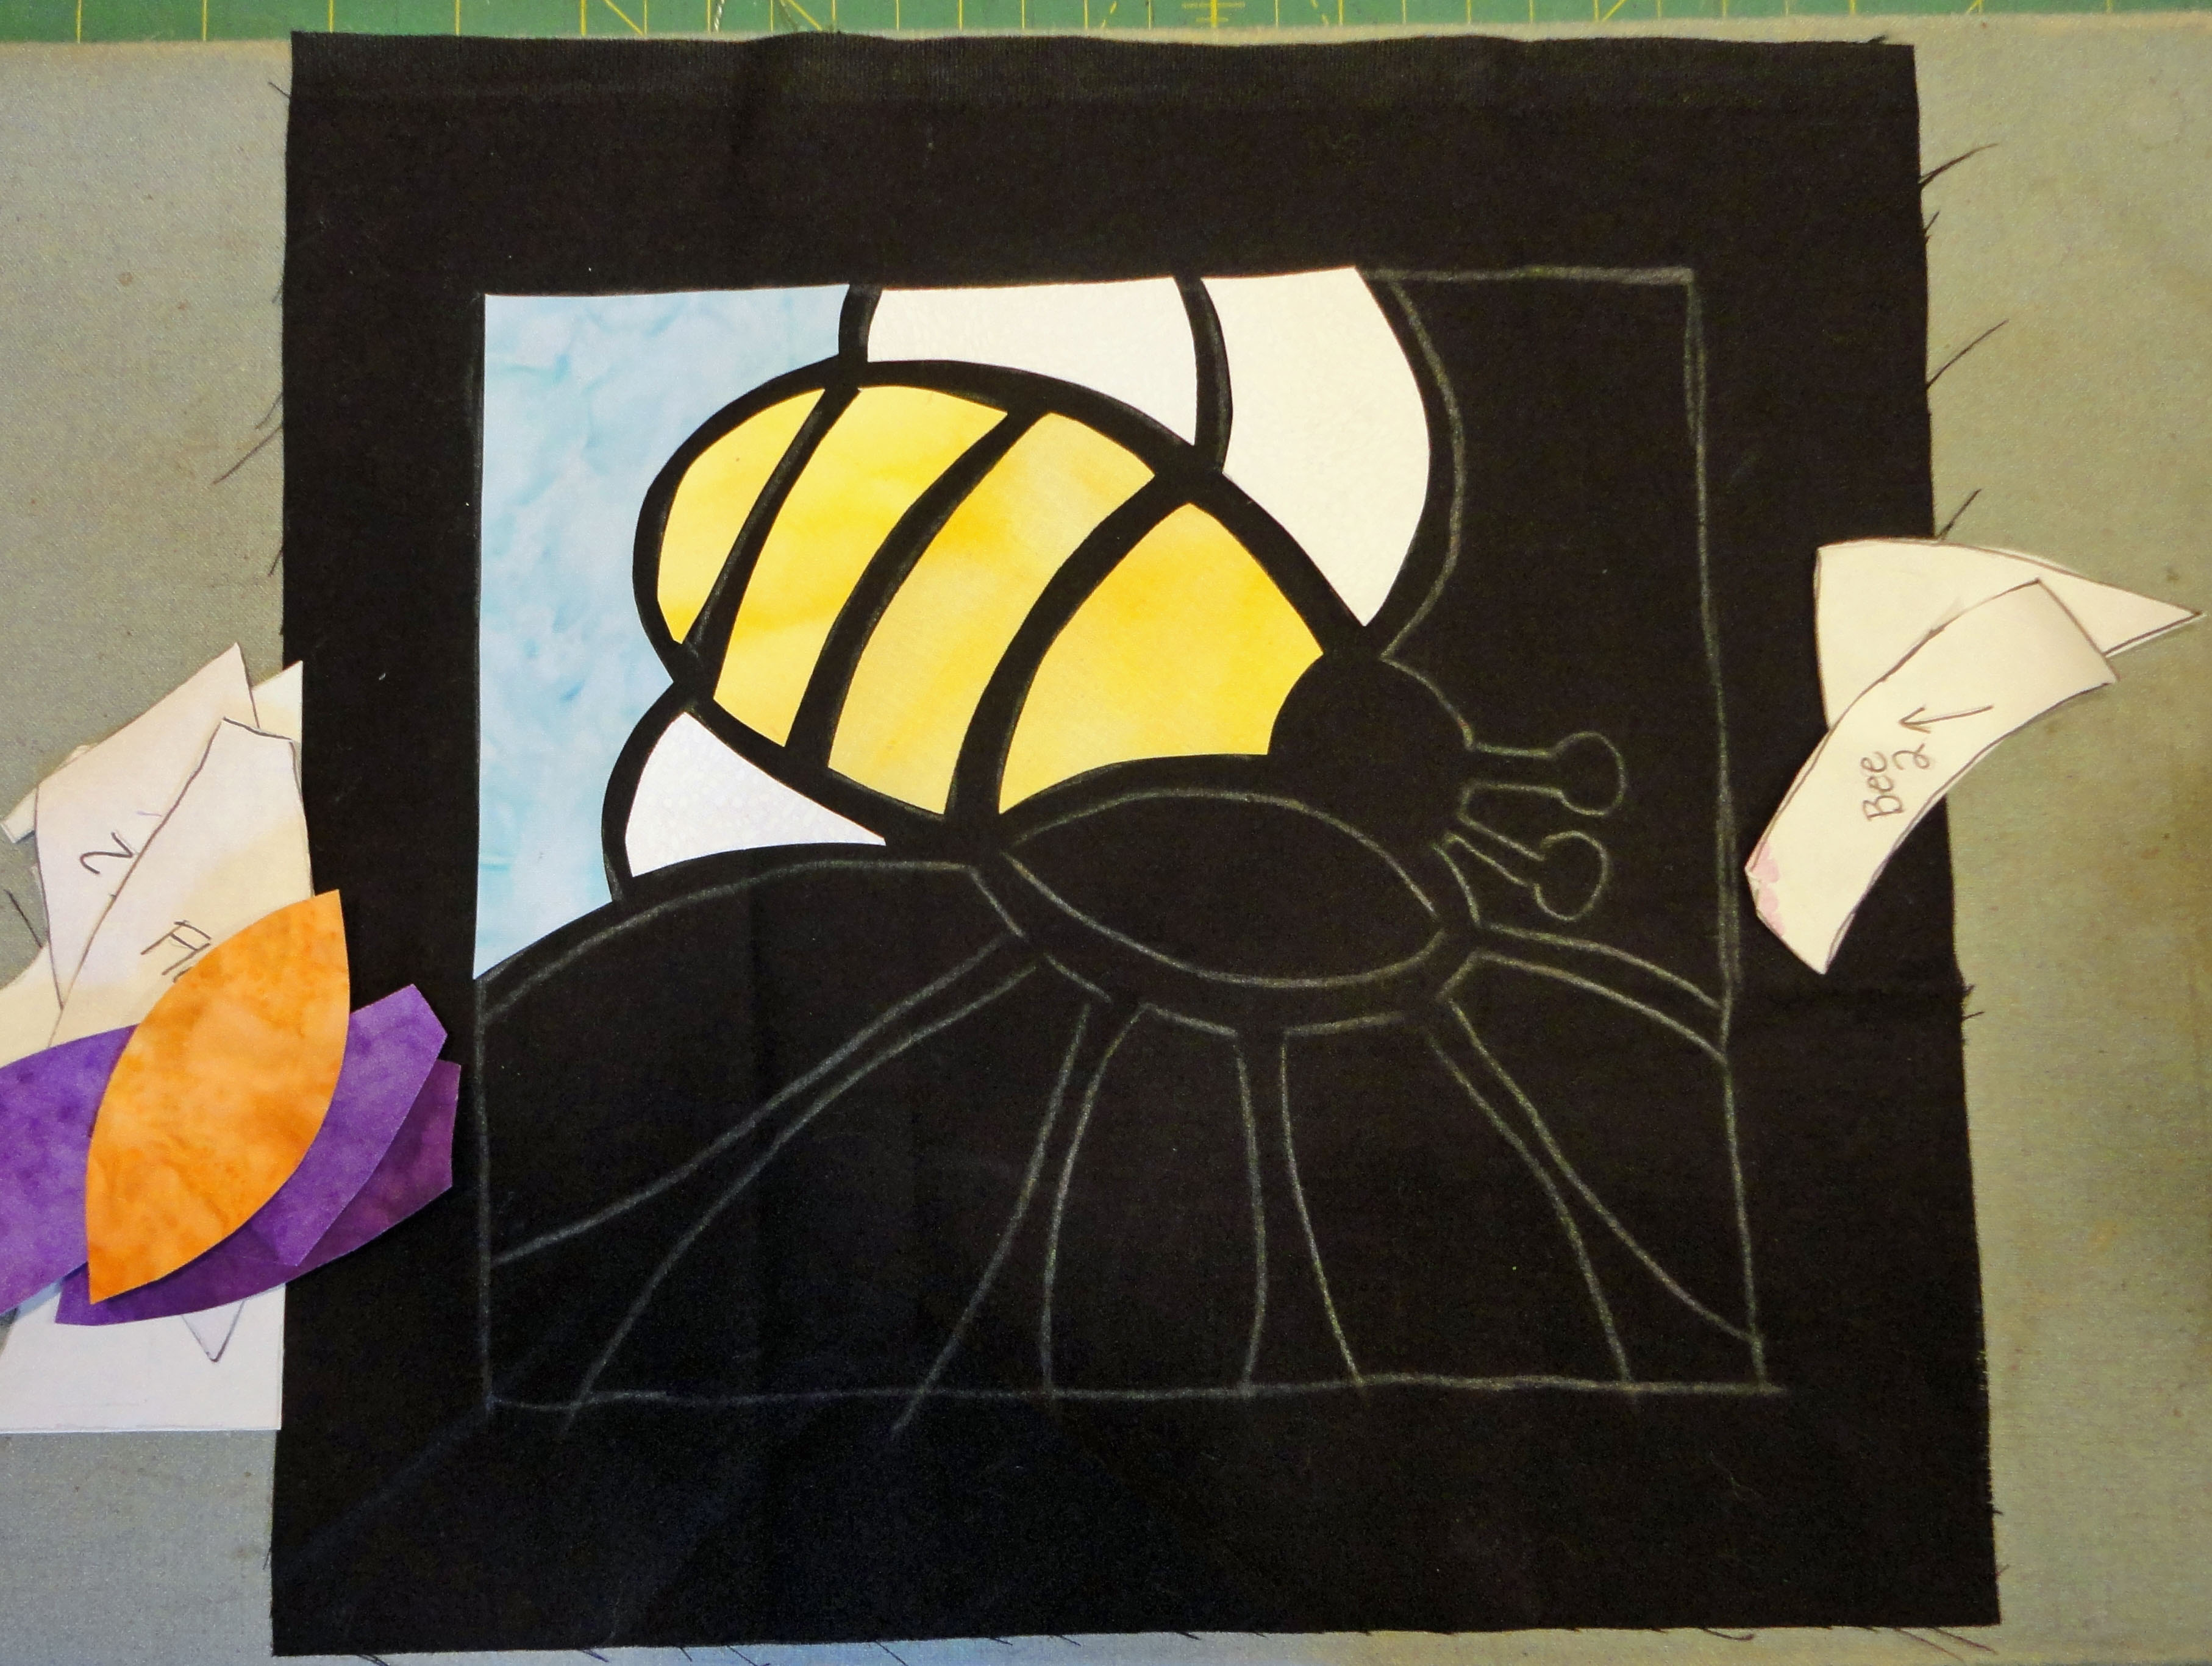
Step one: trace non-reversed drawing on your black background fabric using chalk
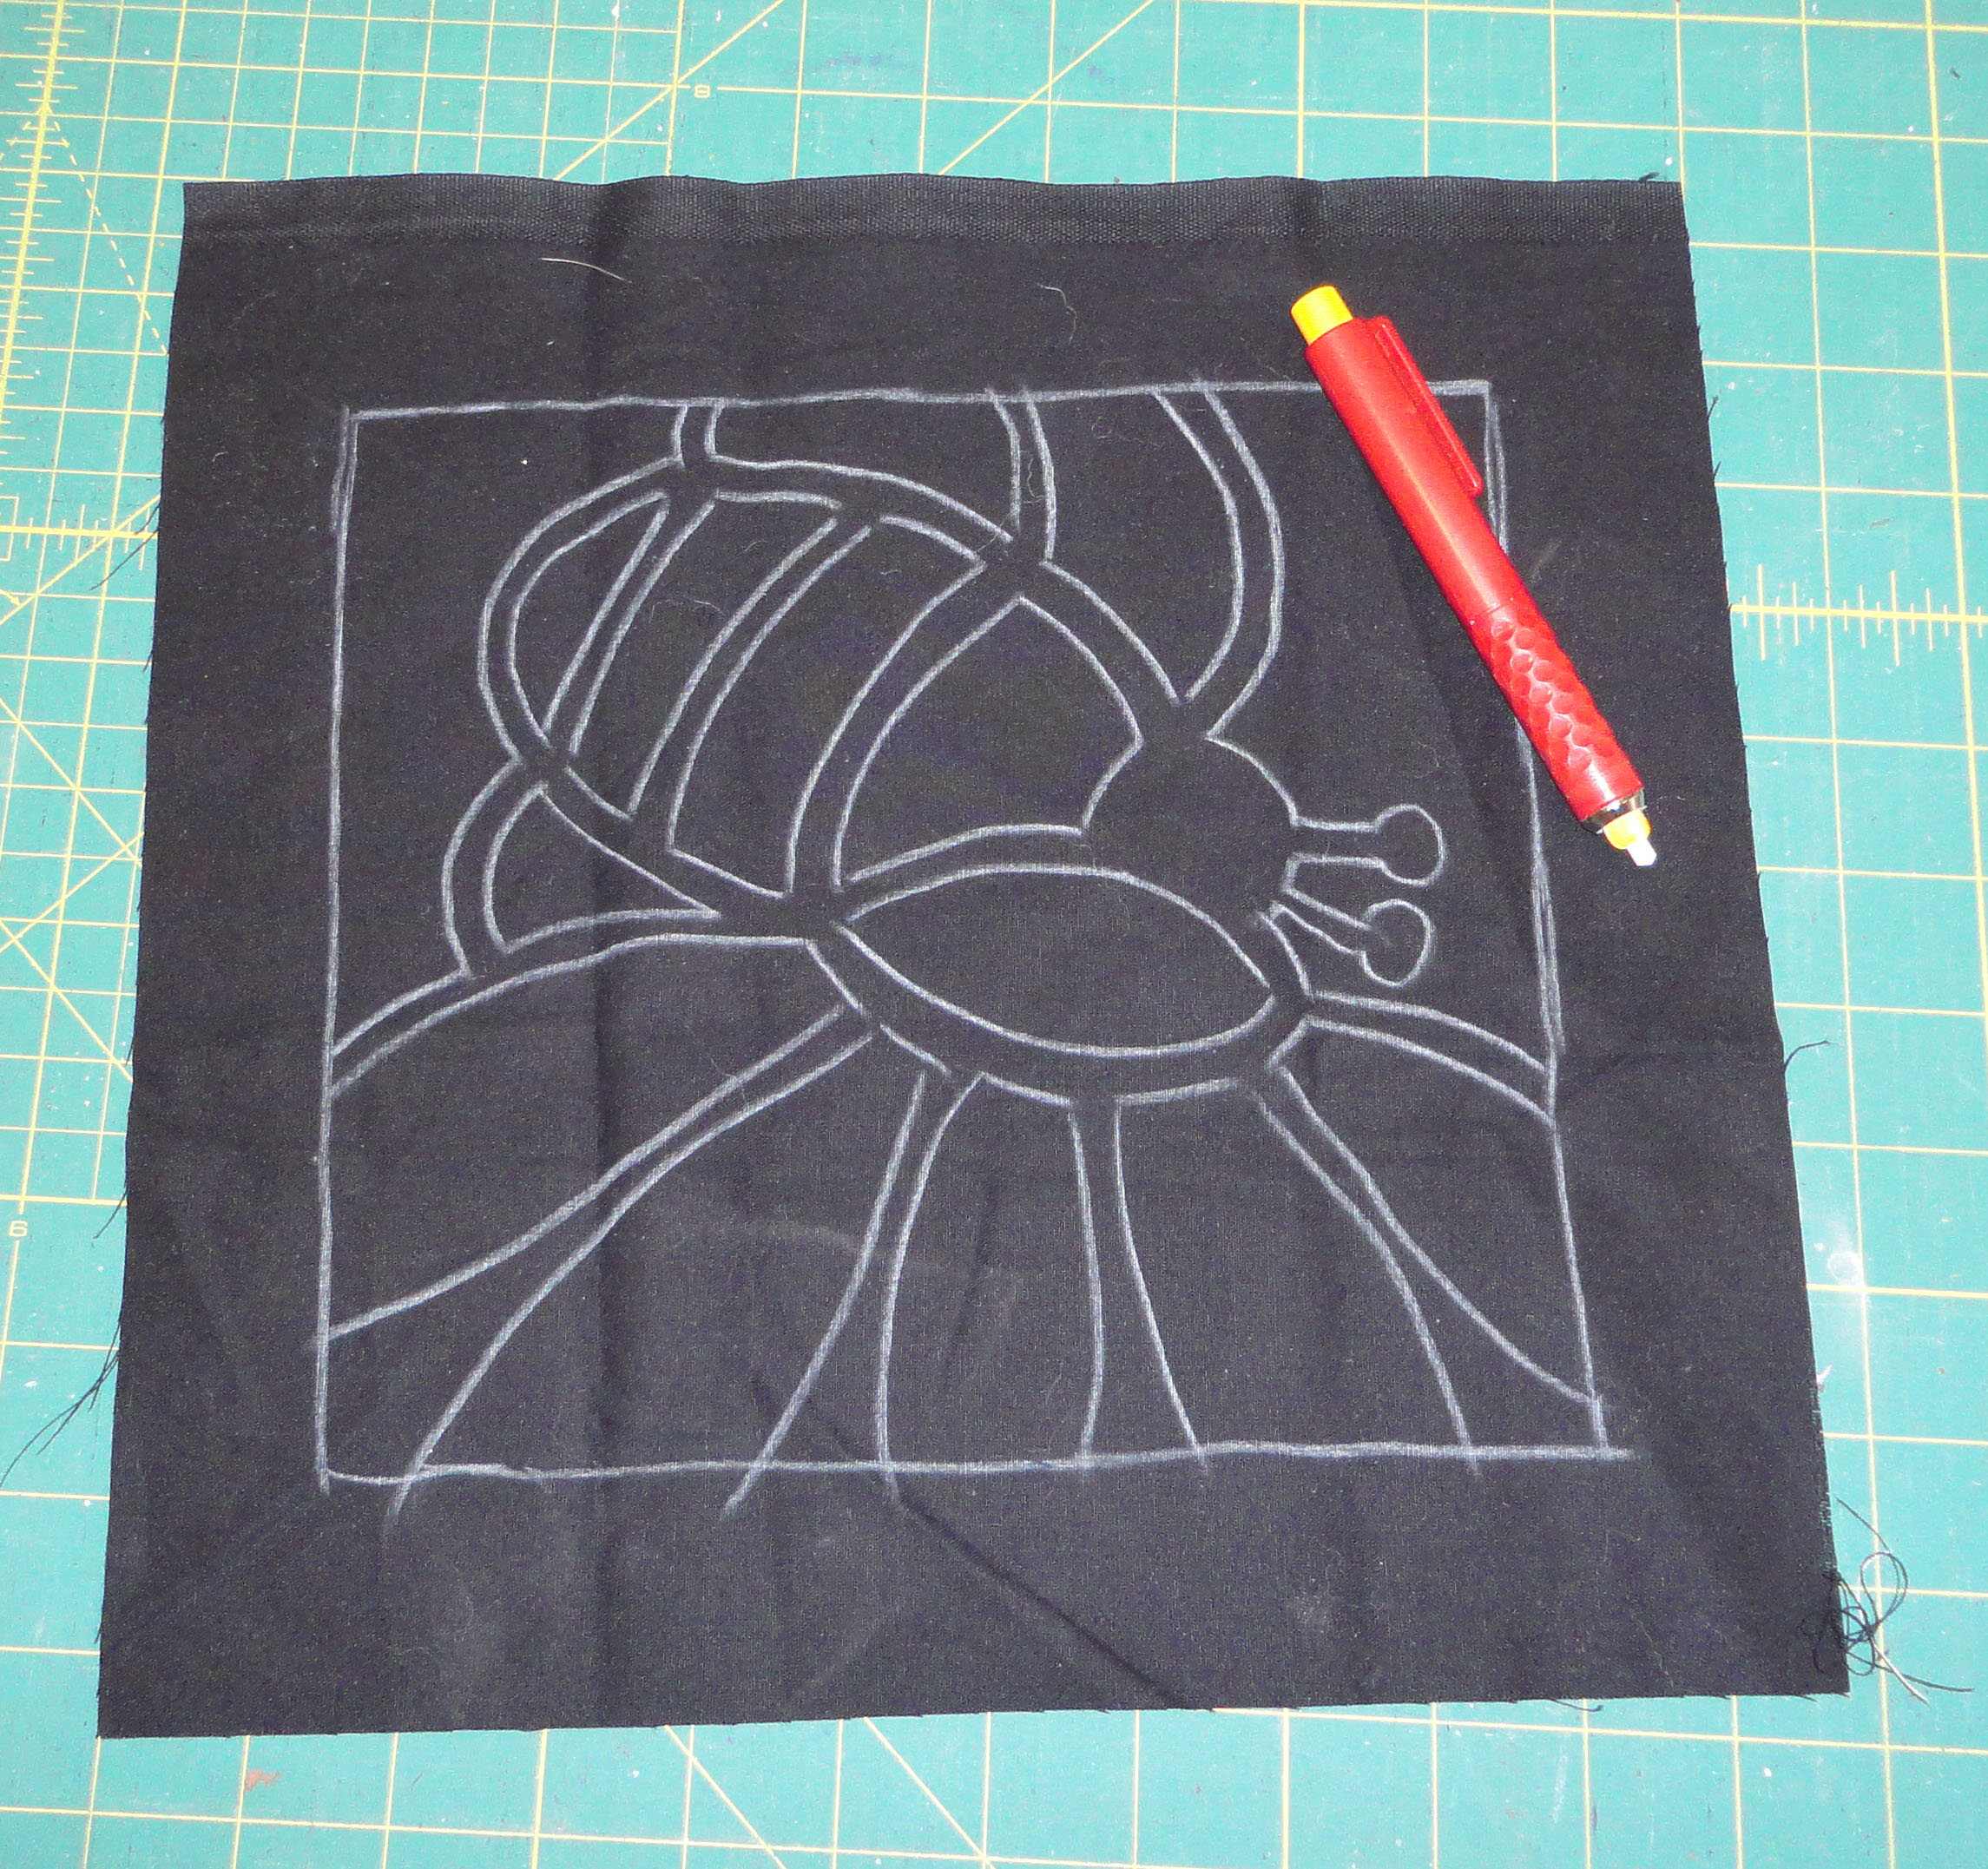 To do this, tape the black fabric over the drawing leaving an approximately 2” margin all around it. The fabric should be right side up. I normally use a window for this step-it gives me a nice, big light table!
Using a chalk pencil I trace the drawing on the black and when finished set the fabric aside.
Note that the Bee is “flying” to the right-this is the correct direction
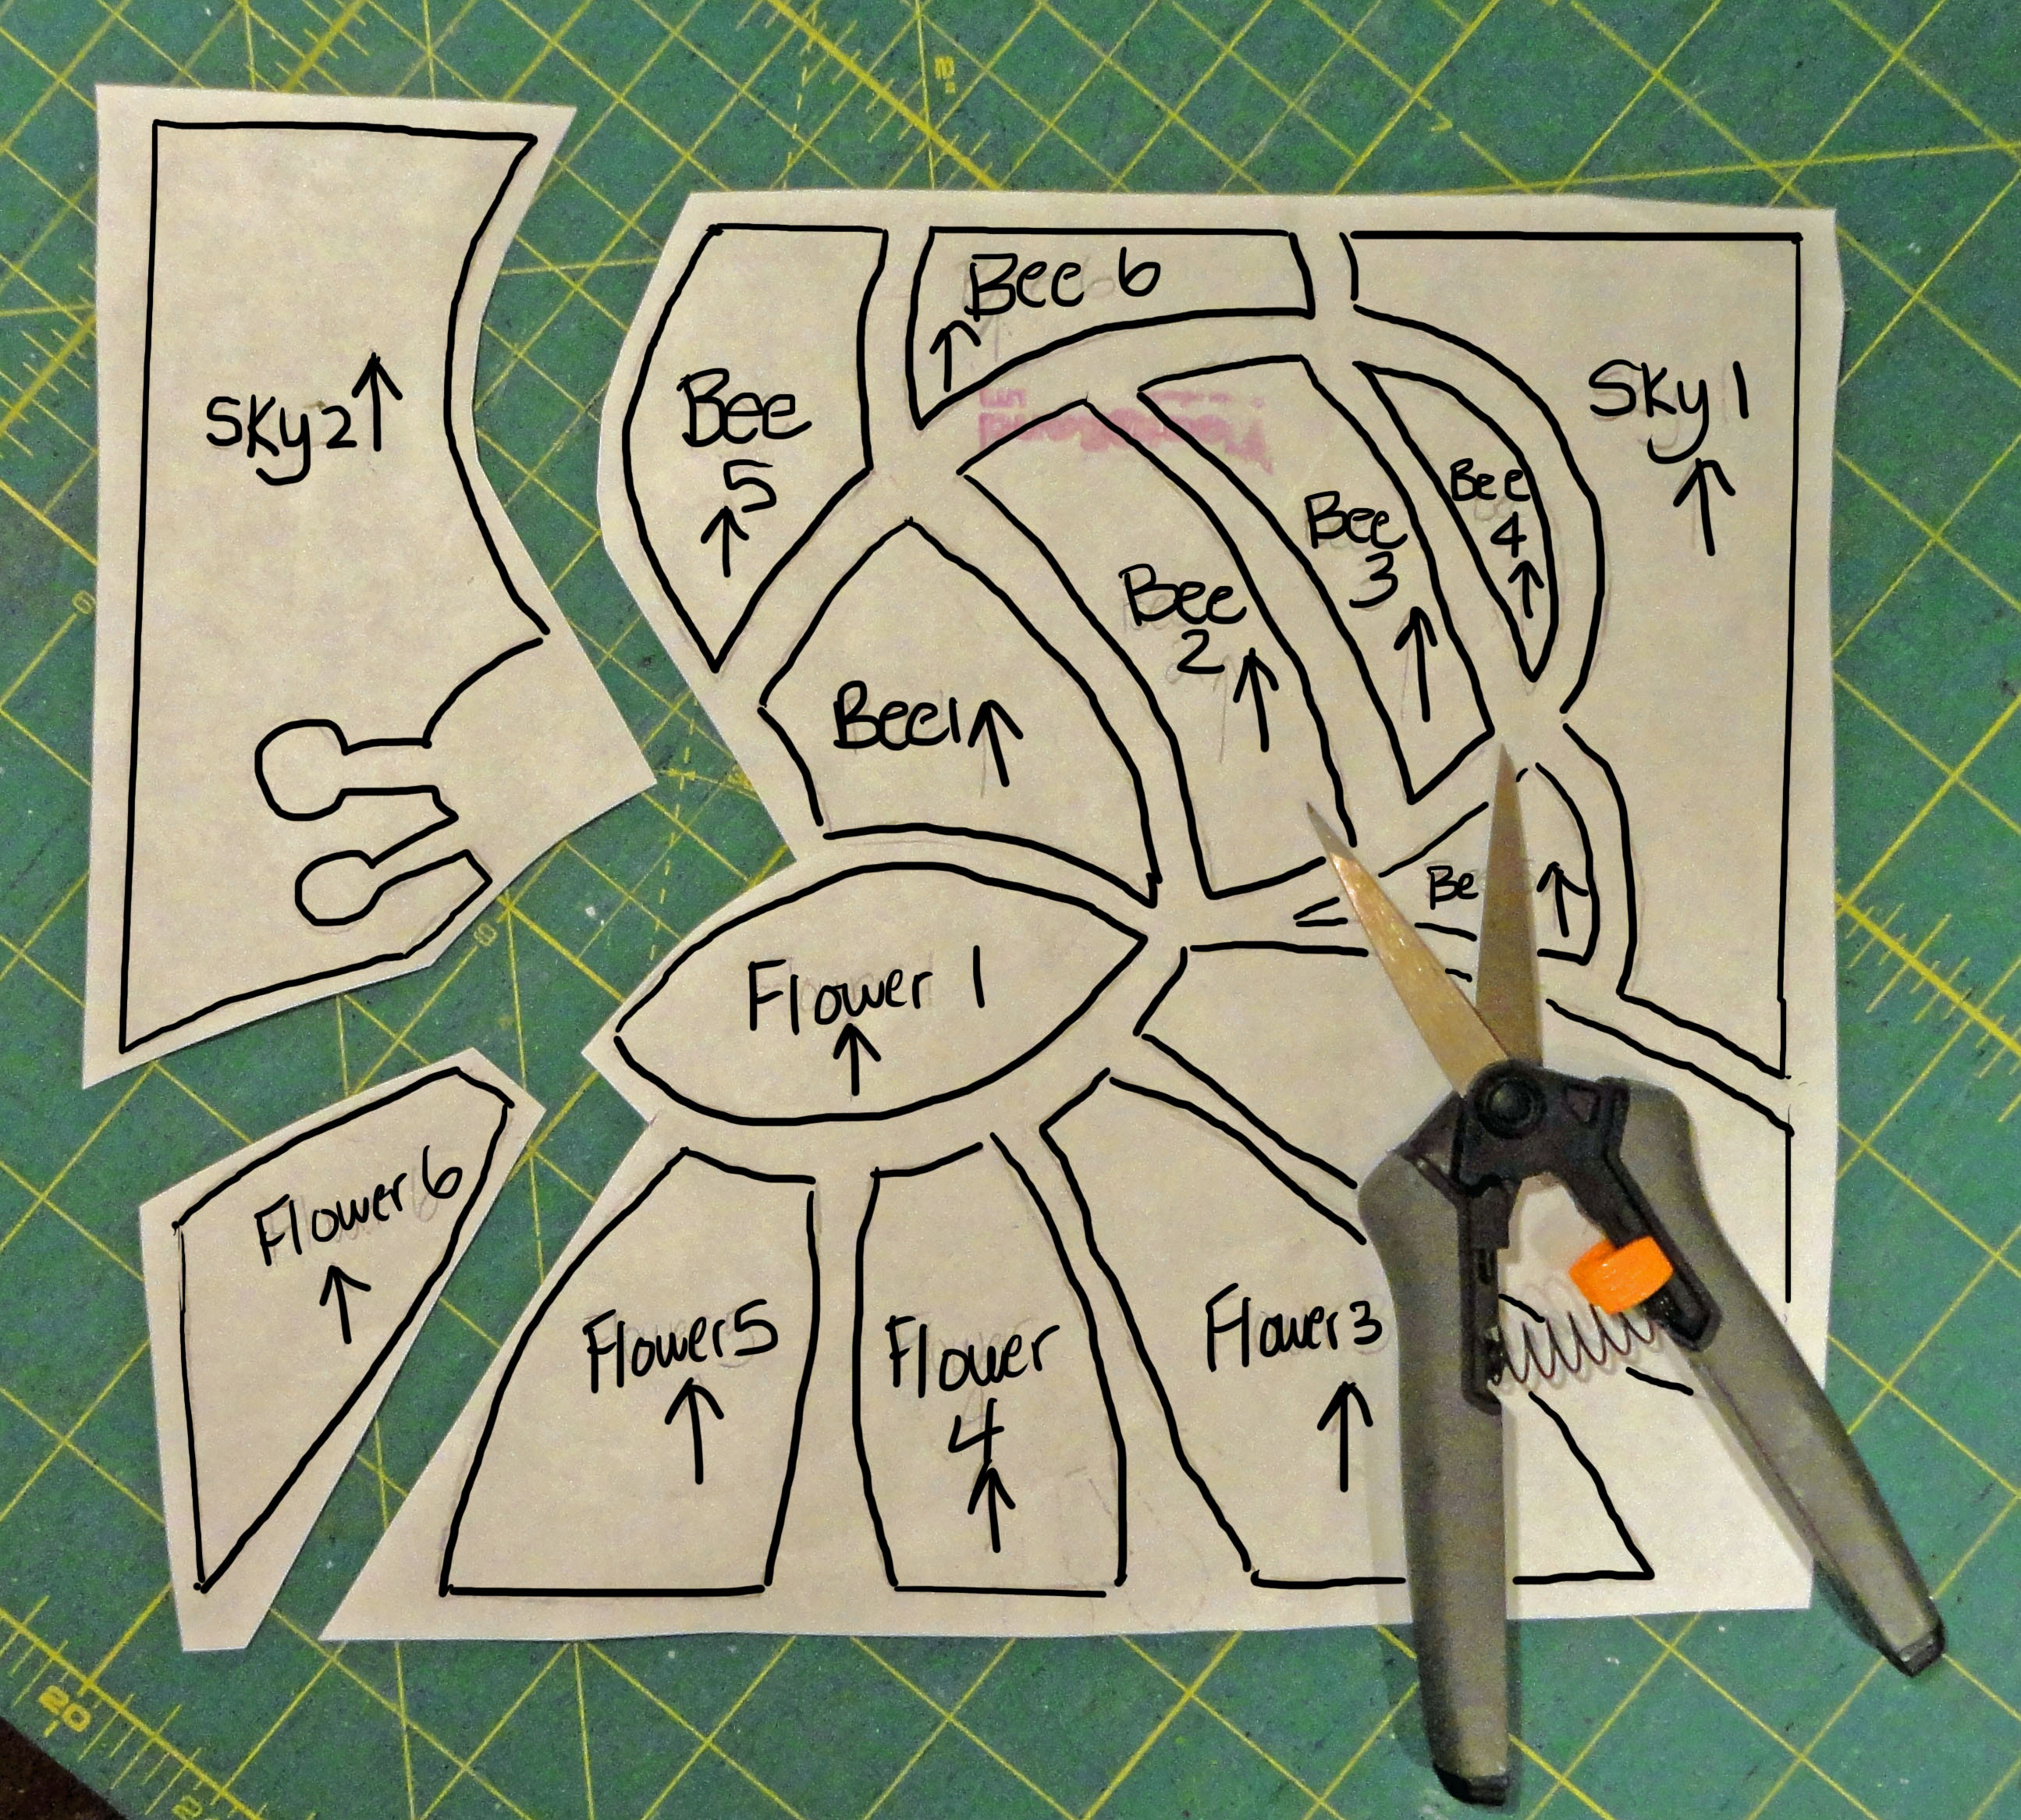
Step two: Reverse the drawing and trace this on the paper side of your fusible web with a pencil or sharpie/pen
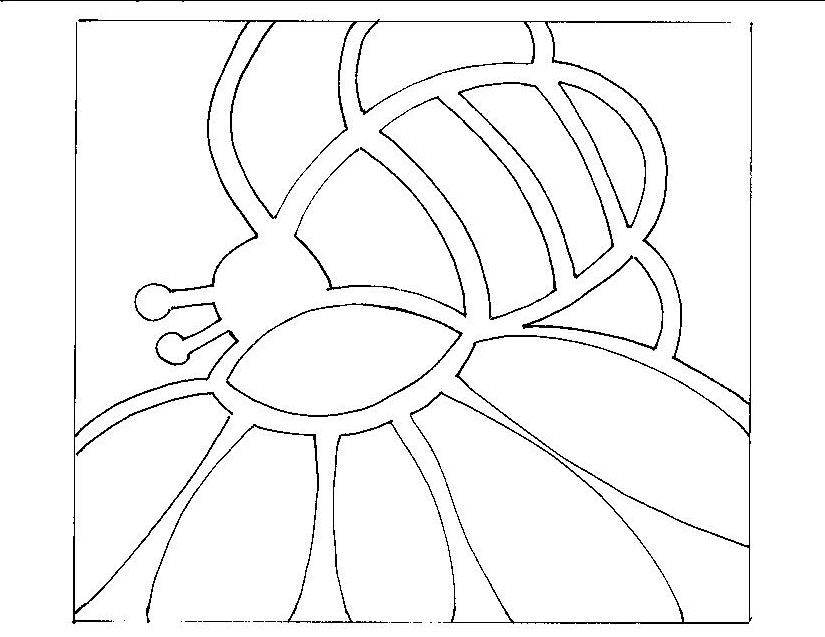
Drawing Reversed
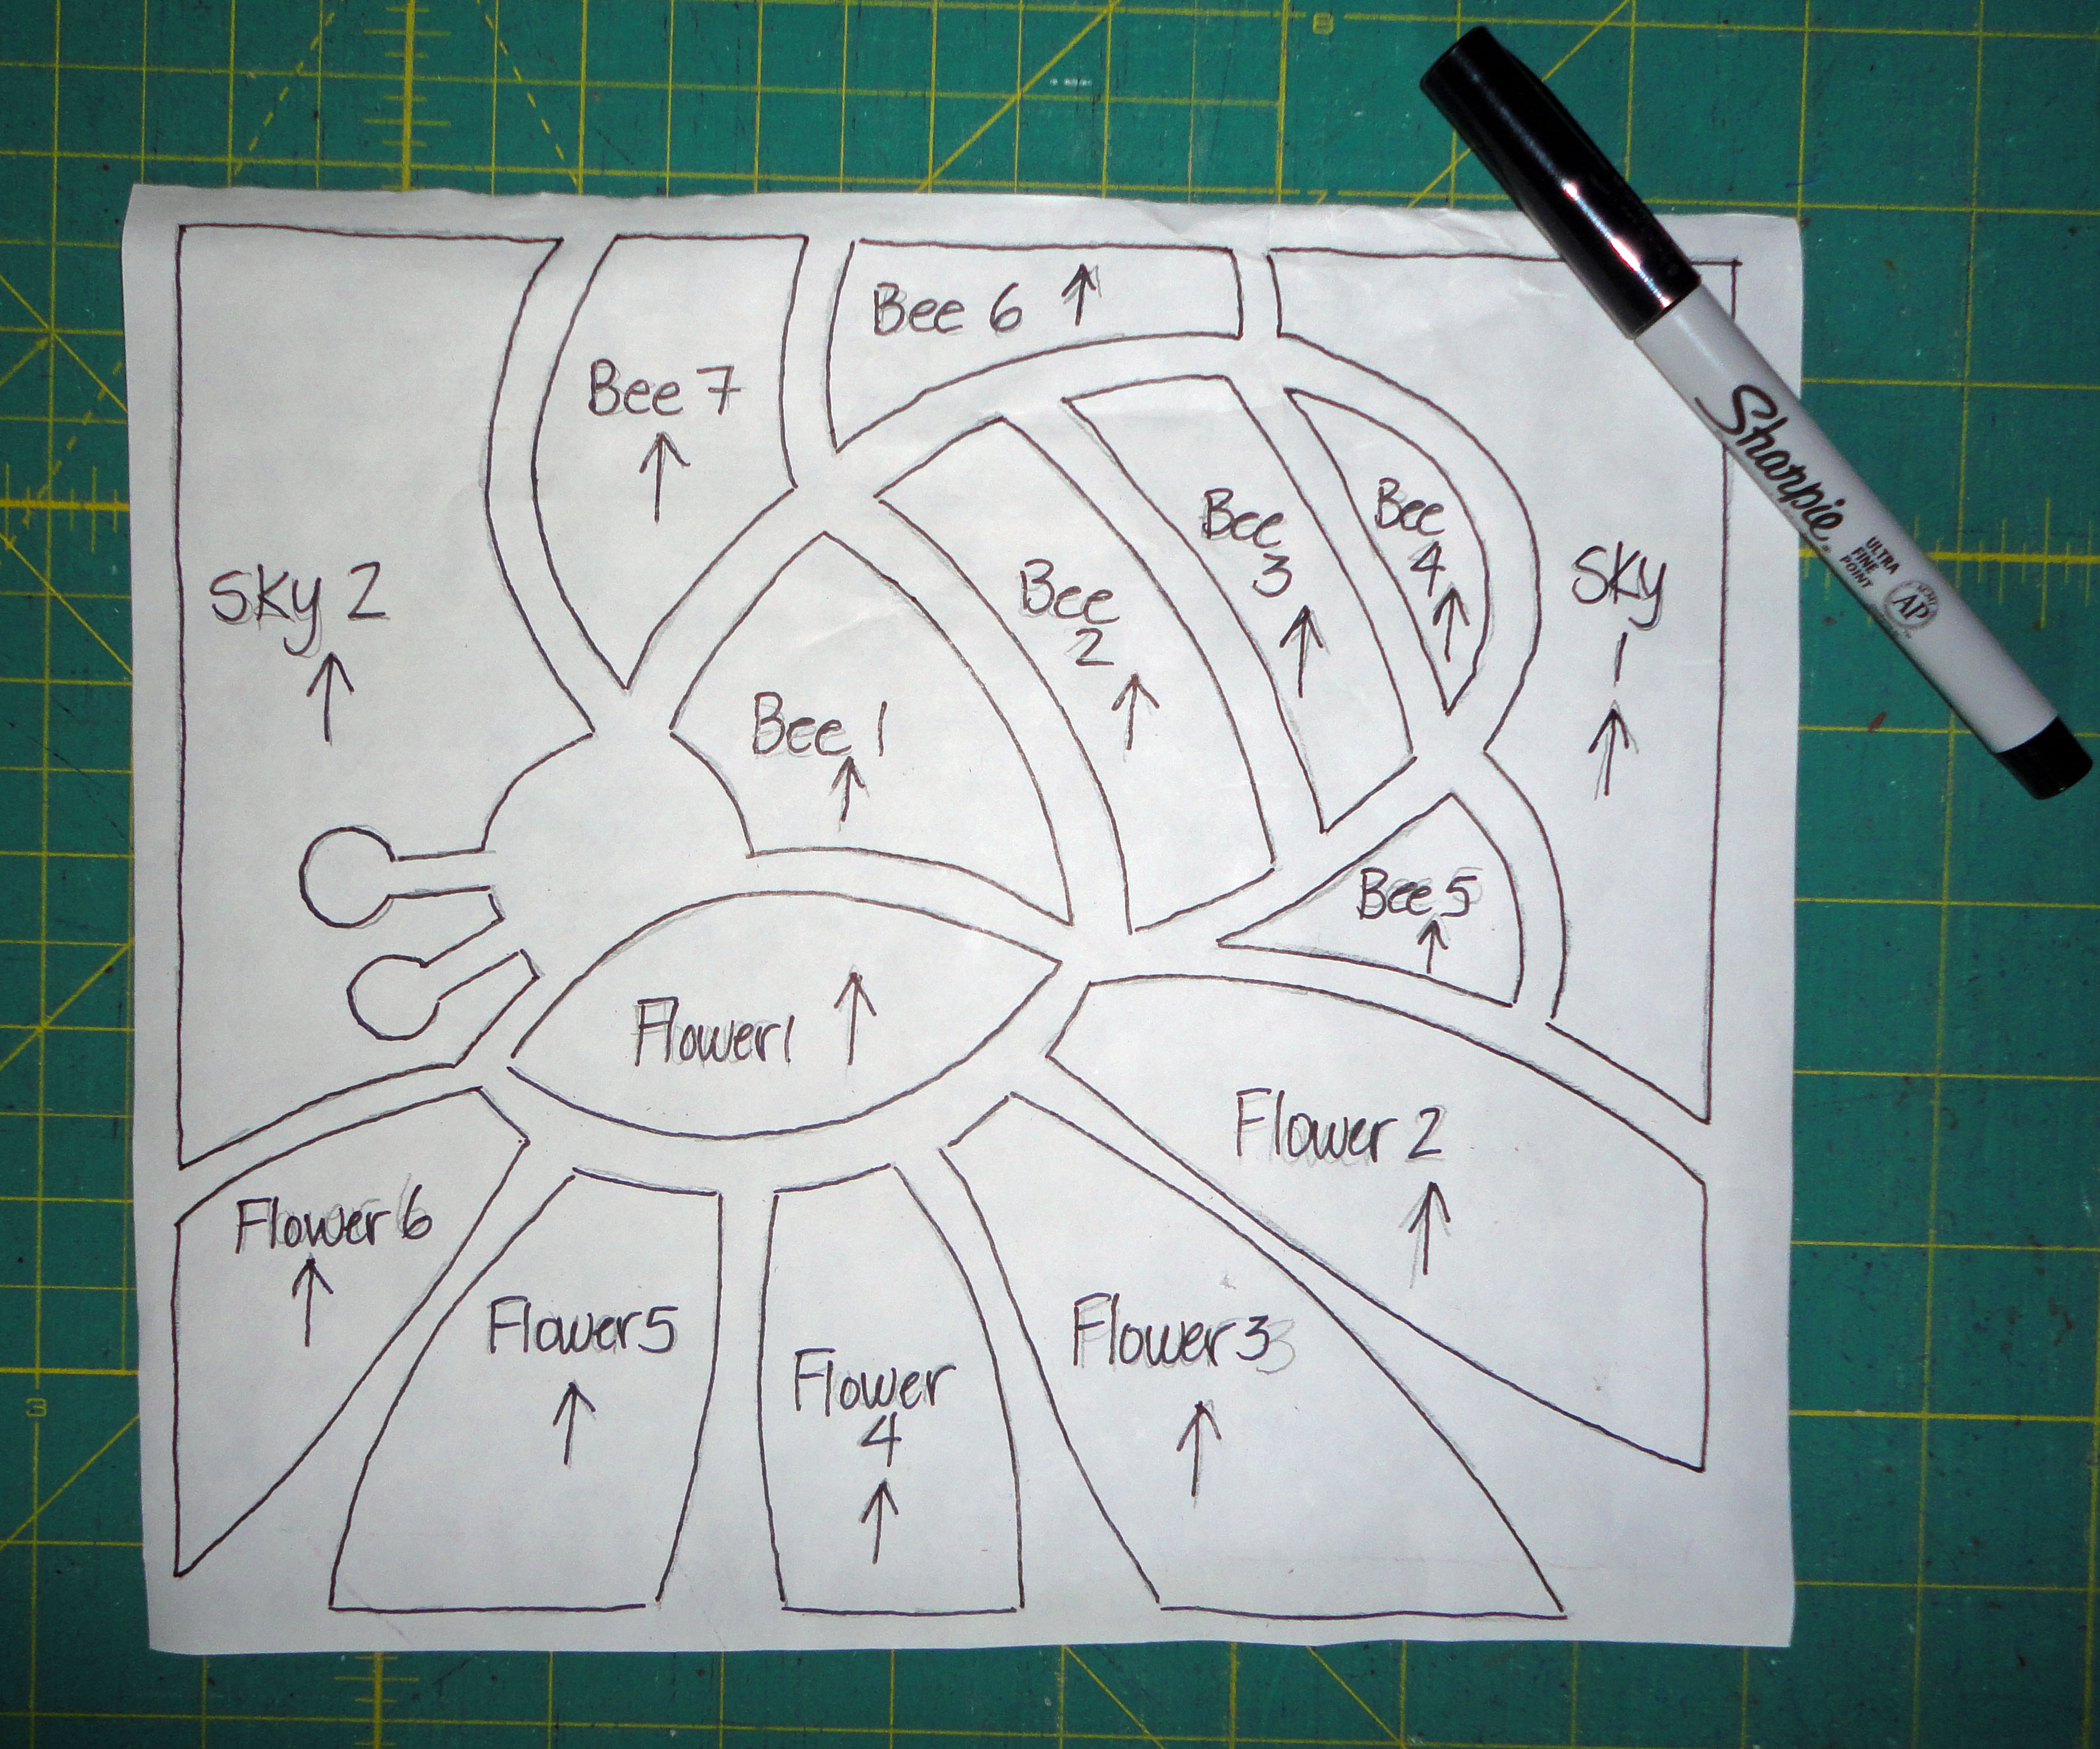
reversed drawing traced on fusible web with labels and arrows
When tracing, label the pieces and put a “this way up” arrow on each piece
Note that the bee is “flying” to the left-the opposite of the finished picture
Turn the drawing over and trace the lines and numbers on the back to make it easier to see them and begin tracing the reversed drawing on the paper side of the fusible web with a pencil or fine sharpie. I find that if I retrace the picture on the back of the drawing I can then trace it on the fusible without a window or light table – try it yourself and see.
Note about Heat n’ Bond Lite
If you are using Heat n’ Bond Lite, you only trace the shapes from the drawing that completely fit on the fusible. This design fits on a single piece of fusible web; however, larger designs are taller or wider than 17″ and will require more than one piece. Trace as much of the design as you can on your first piece of web. Don’t try to overlap, join or butt web pieces together-“butting” pieces of fusible will sometimes create a line that shows on the finished quilt. (Some other fusible products can be “butted”, it depends on the brand.). Just leave out those pieces that hang off or won’t fit. Fit as many of the remaining design bits as you can on the next piece of web. Any design pieces that still don’t fit will need to be traced separately. Keep track of design pieces that don’t fit when you’re tracing and check them off as you find a spot on the fusible for them.
Step three: Cut apart the fusible between the traced shapes
cut apart fusible between the drawn lines
Once the tracing part is done, cut the design up by cutting in between the drawn lines. You will end up with lots of small pieces which I sort into baggies by what they will end up being-for example, all the pieces of a hill or all the foliage on a tree. As I select my fabrics I put them with the cut out pieces so that when it comes time to fuse I have everything organized.
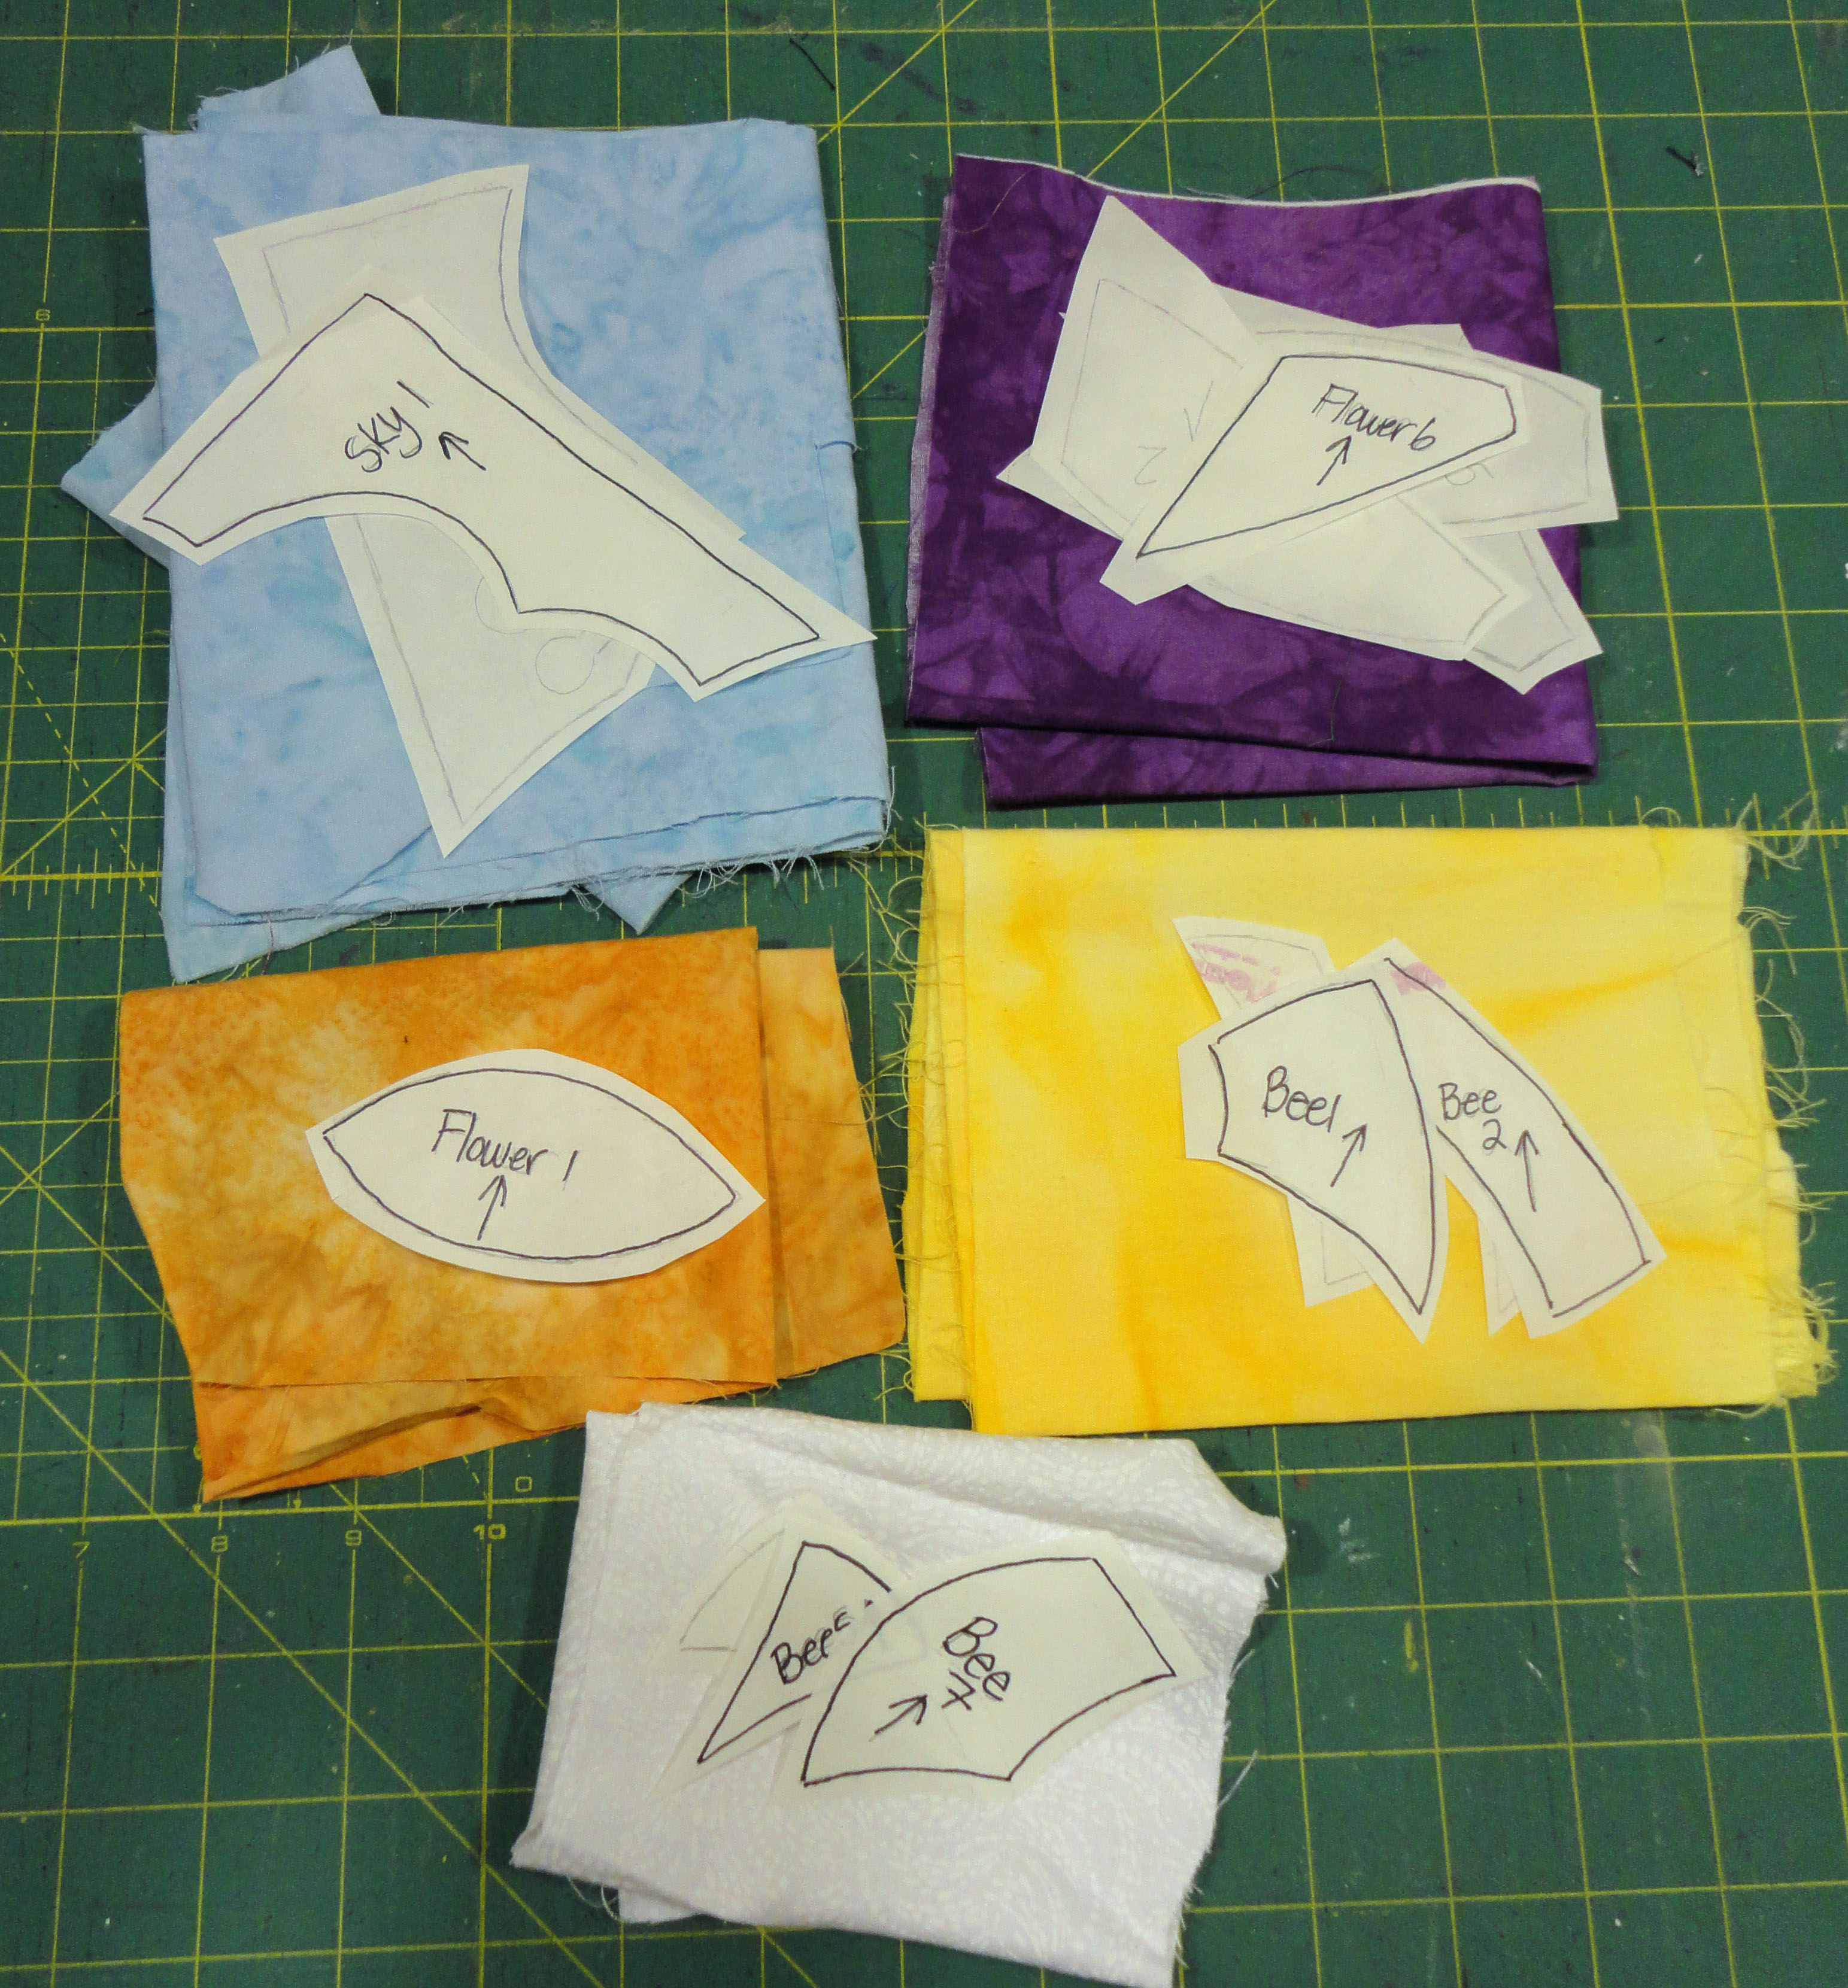
keep similar pieces together and put them with the fabric they will be fused to
Step Four: Fuse the pieces to the wrong side of the selected fabric- fusible is paper side up. Cut out the shapes on the traced lines.
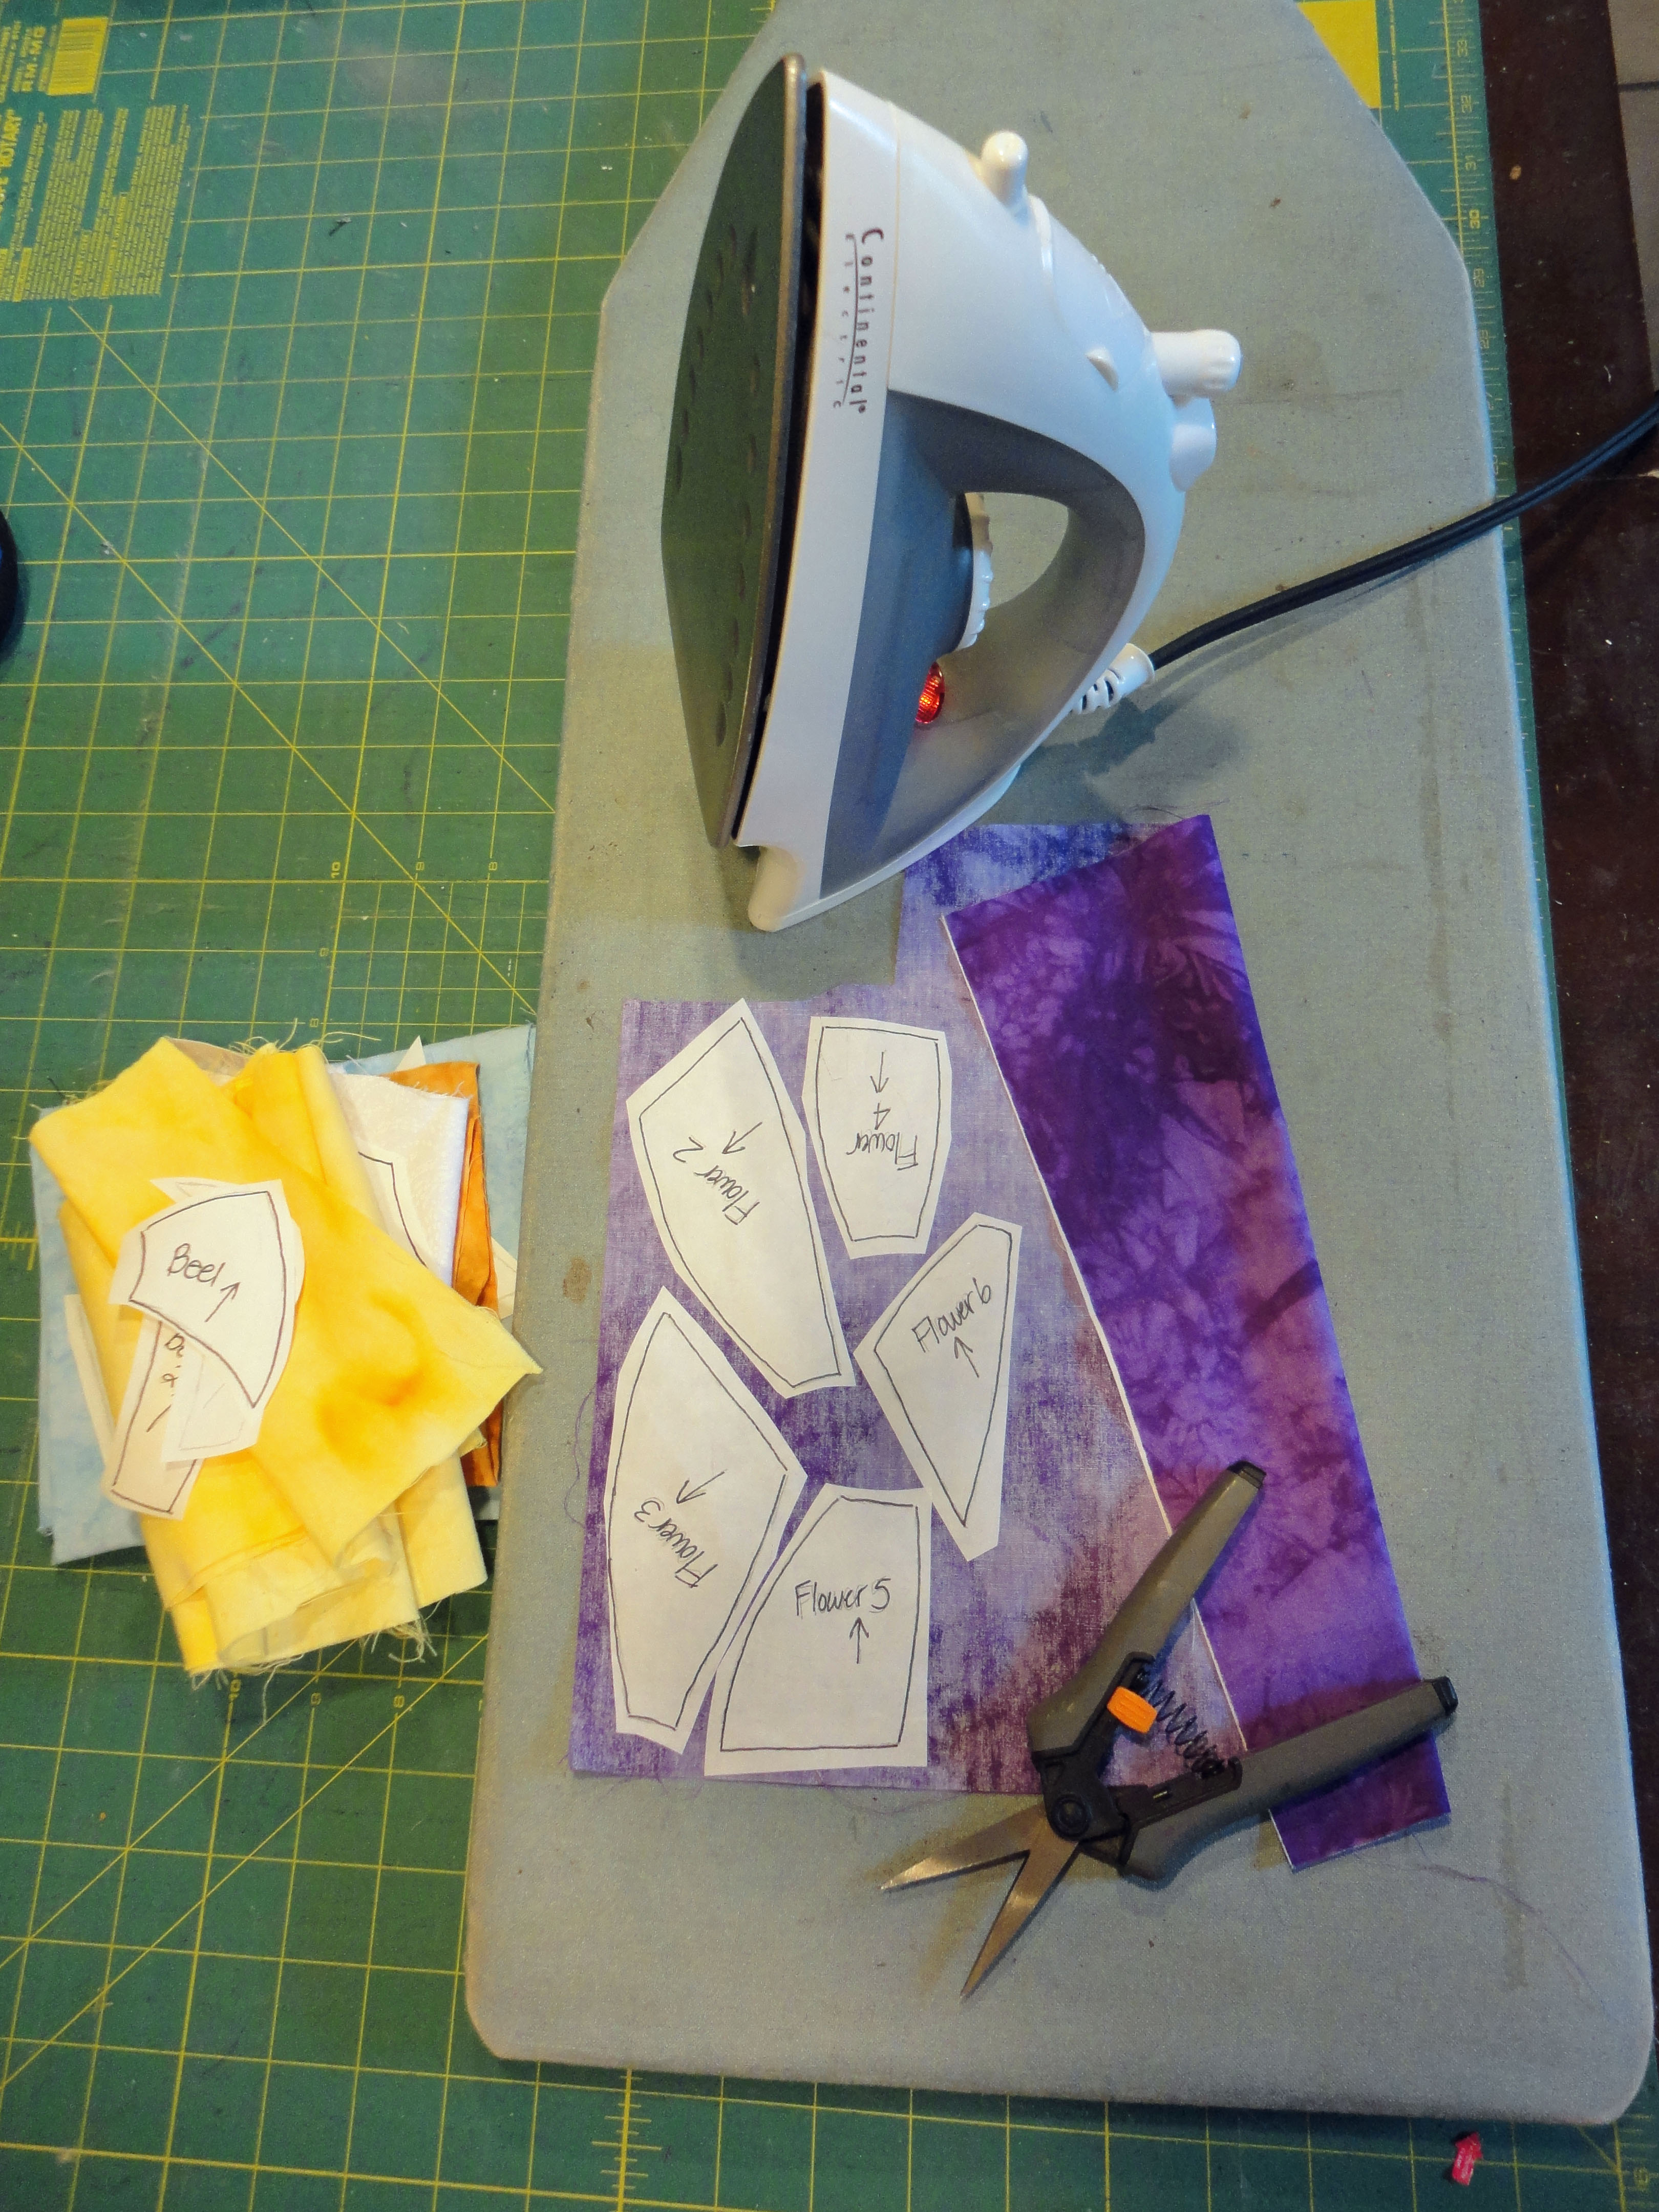 Turn on your iron to Cotton/no steam (double check the manufacturer’s instructions for your fusible). Place the fabric Right Side Down on the ironing board and give it a press. Place the cut out fusible pieces Paper Side Up on the fabric leaving a small space between them and place the iron on them for a few seconds to fuse them to the fabric (again, check fusible instructions). This is one place where your directional arrows are helpful, especially if your fabric has a directional pattern.
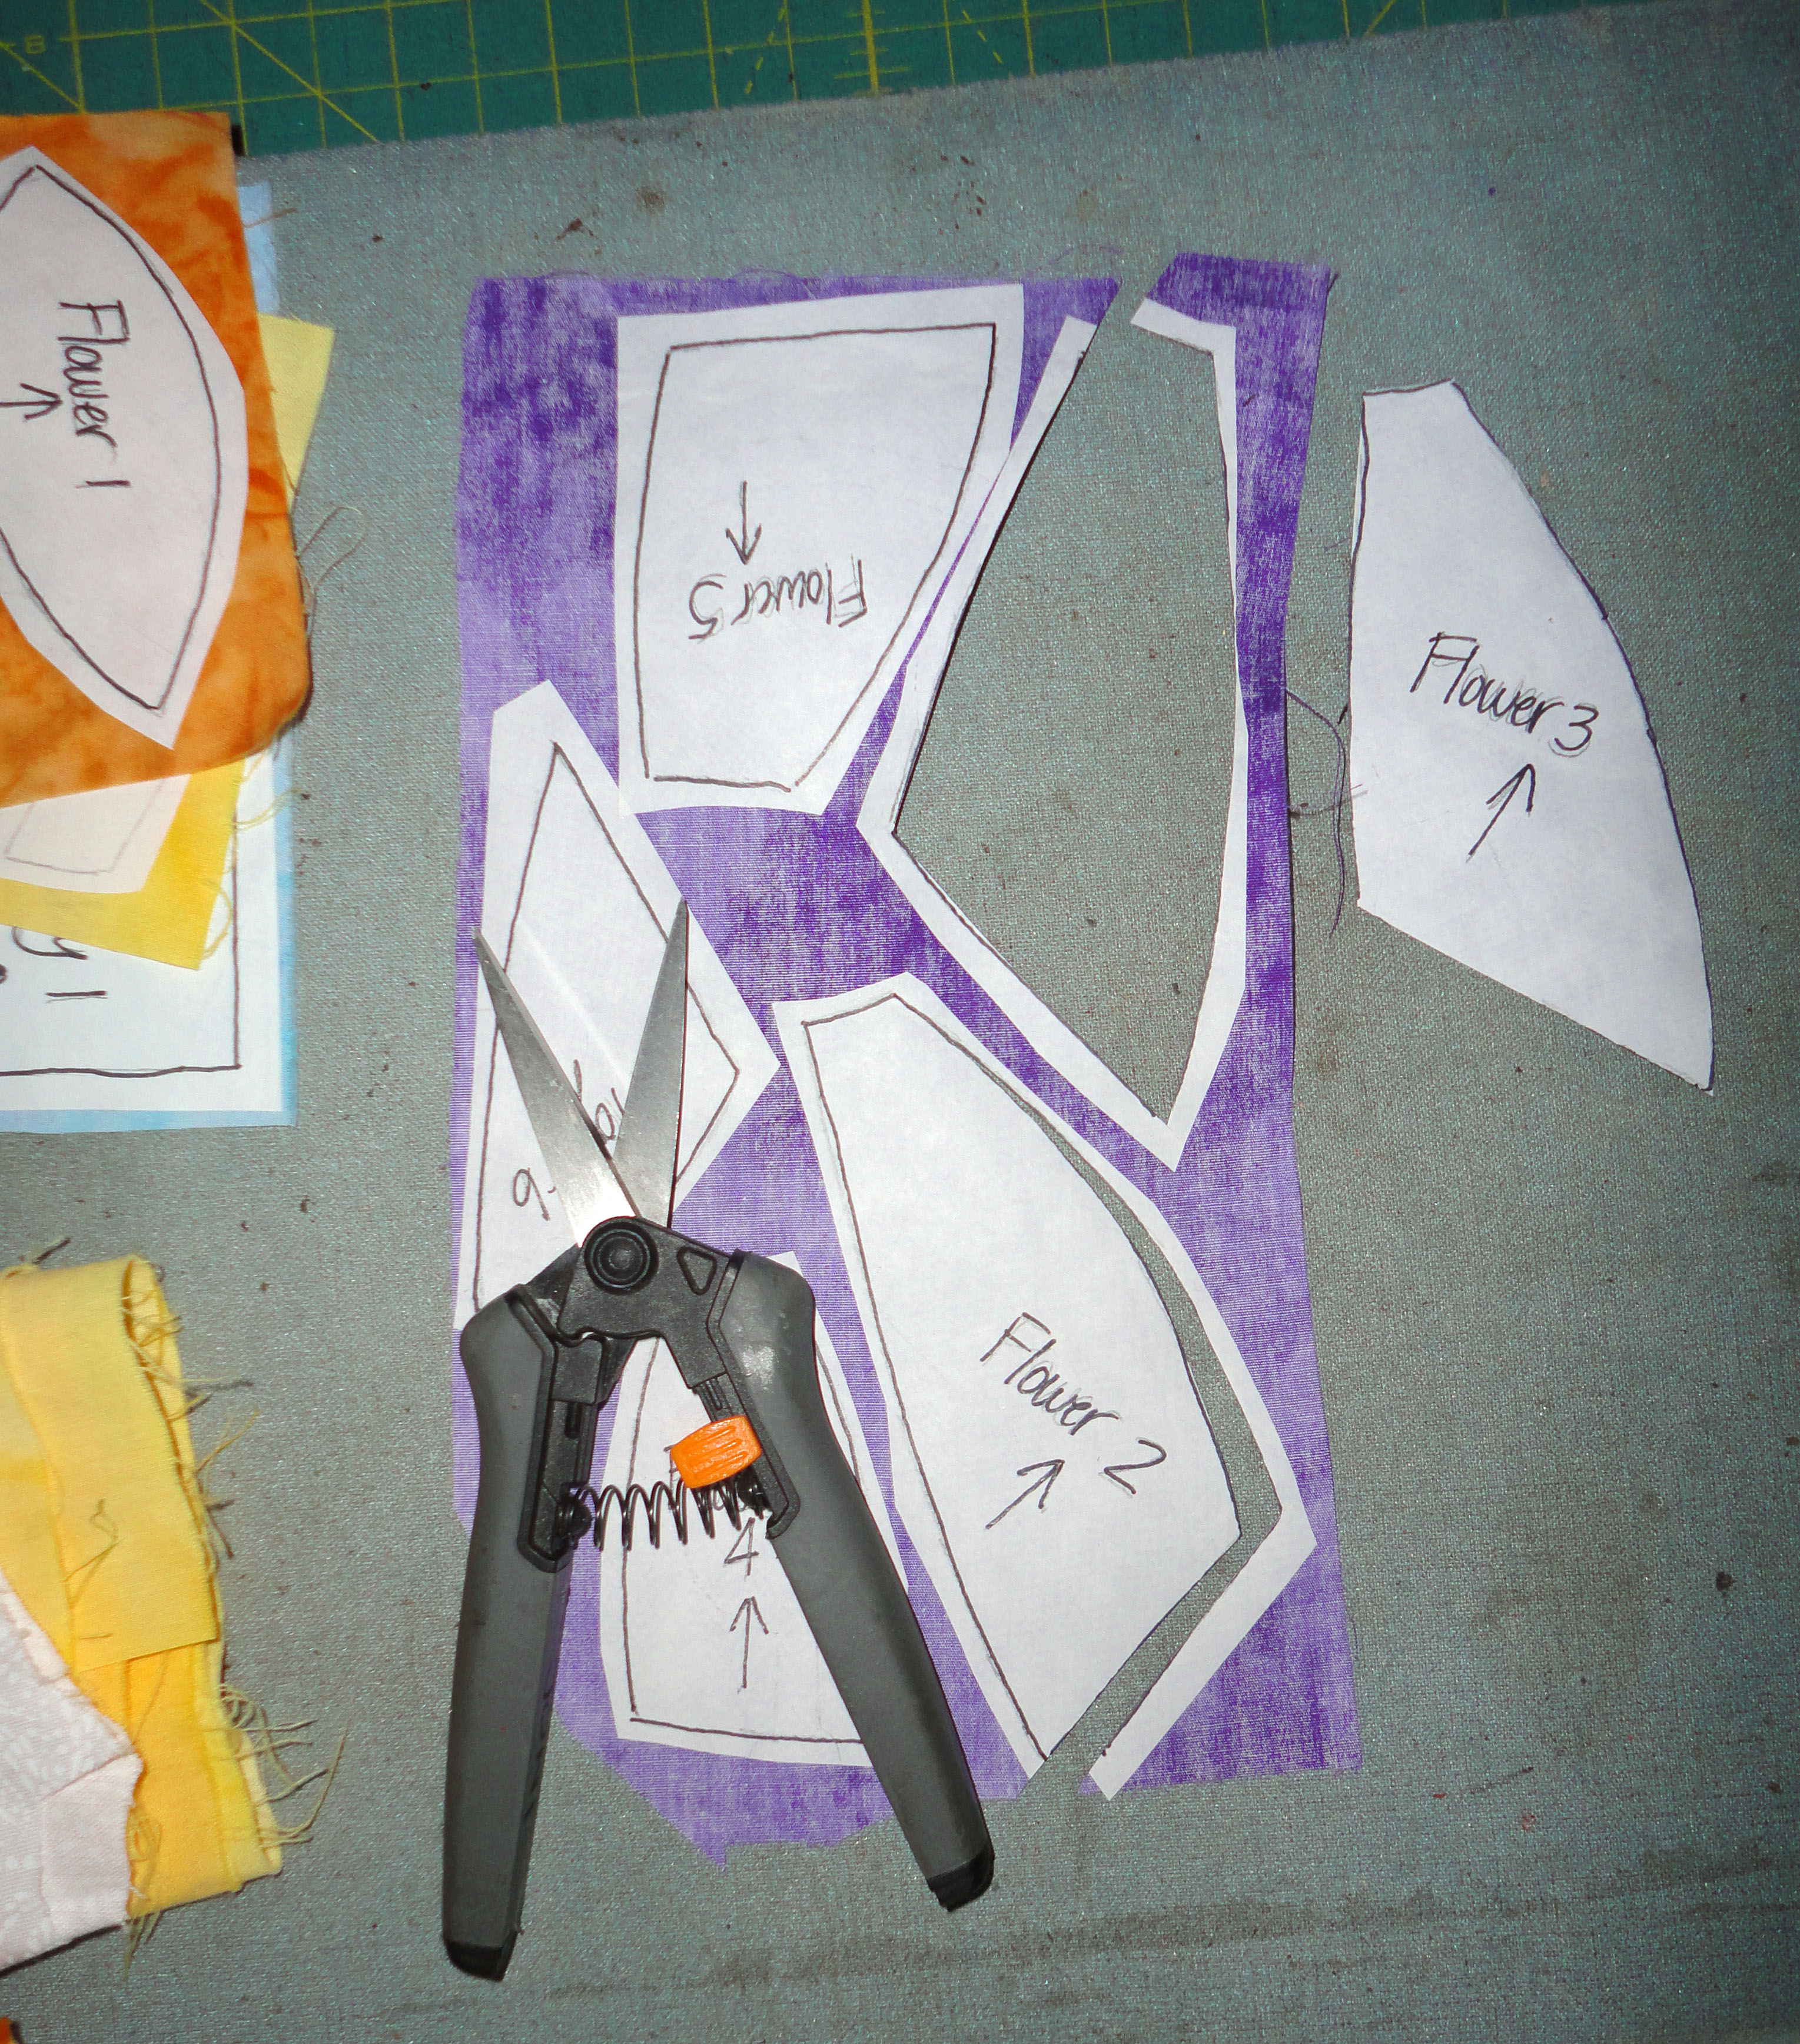
Allow the piece to cool and cut out the traced shape. Don’t peel off the paper yet. If you have leftover fabric, make sure to trim off any that has fusible on it before you return it to your stash! Place the cut pieces back in their bags or if you have the space to lay out the black fabric, you can lie the pieces on it to help you choose your other fabrics. I make a temporary ironing board by placing some batting on a table, covering it with some fabric yardage and laying the black fabric on top.
I go through this process choosing and fusing fabrics until all the pieces are on their fabrics and cut out.
Step Five: Place the cut out shapes on the black background fabric following the chalk lines.
If you haven’t made a temporary ironing board, lay the black fabric on your regular board to begin fusing the pieces.
Depending on the design; I usually start at a corner, work my way down a side and then all around the edges, then fill in the drawing with my cut out pieces. The arrows on your pieces will help when deciding how a piece fits.
As you place each piece, peel off the paper back, put it in its spot (shiny side down) and using the tip of the iron, tack it in place by just touching a bit of it with the iron tip for a second or two. You don’t want the piece moving unless you decide to move it around! Tacking it allows you to peel it off if you need to adjust anything.
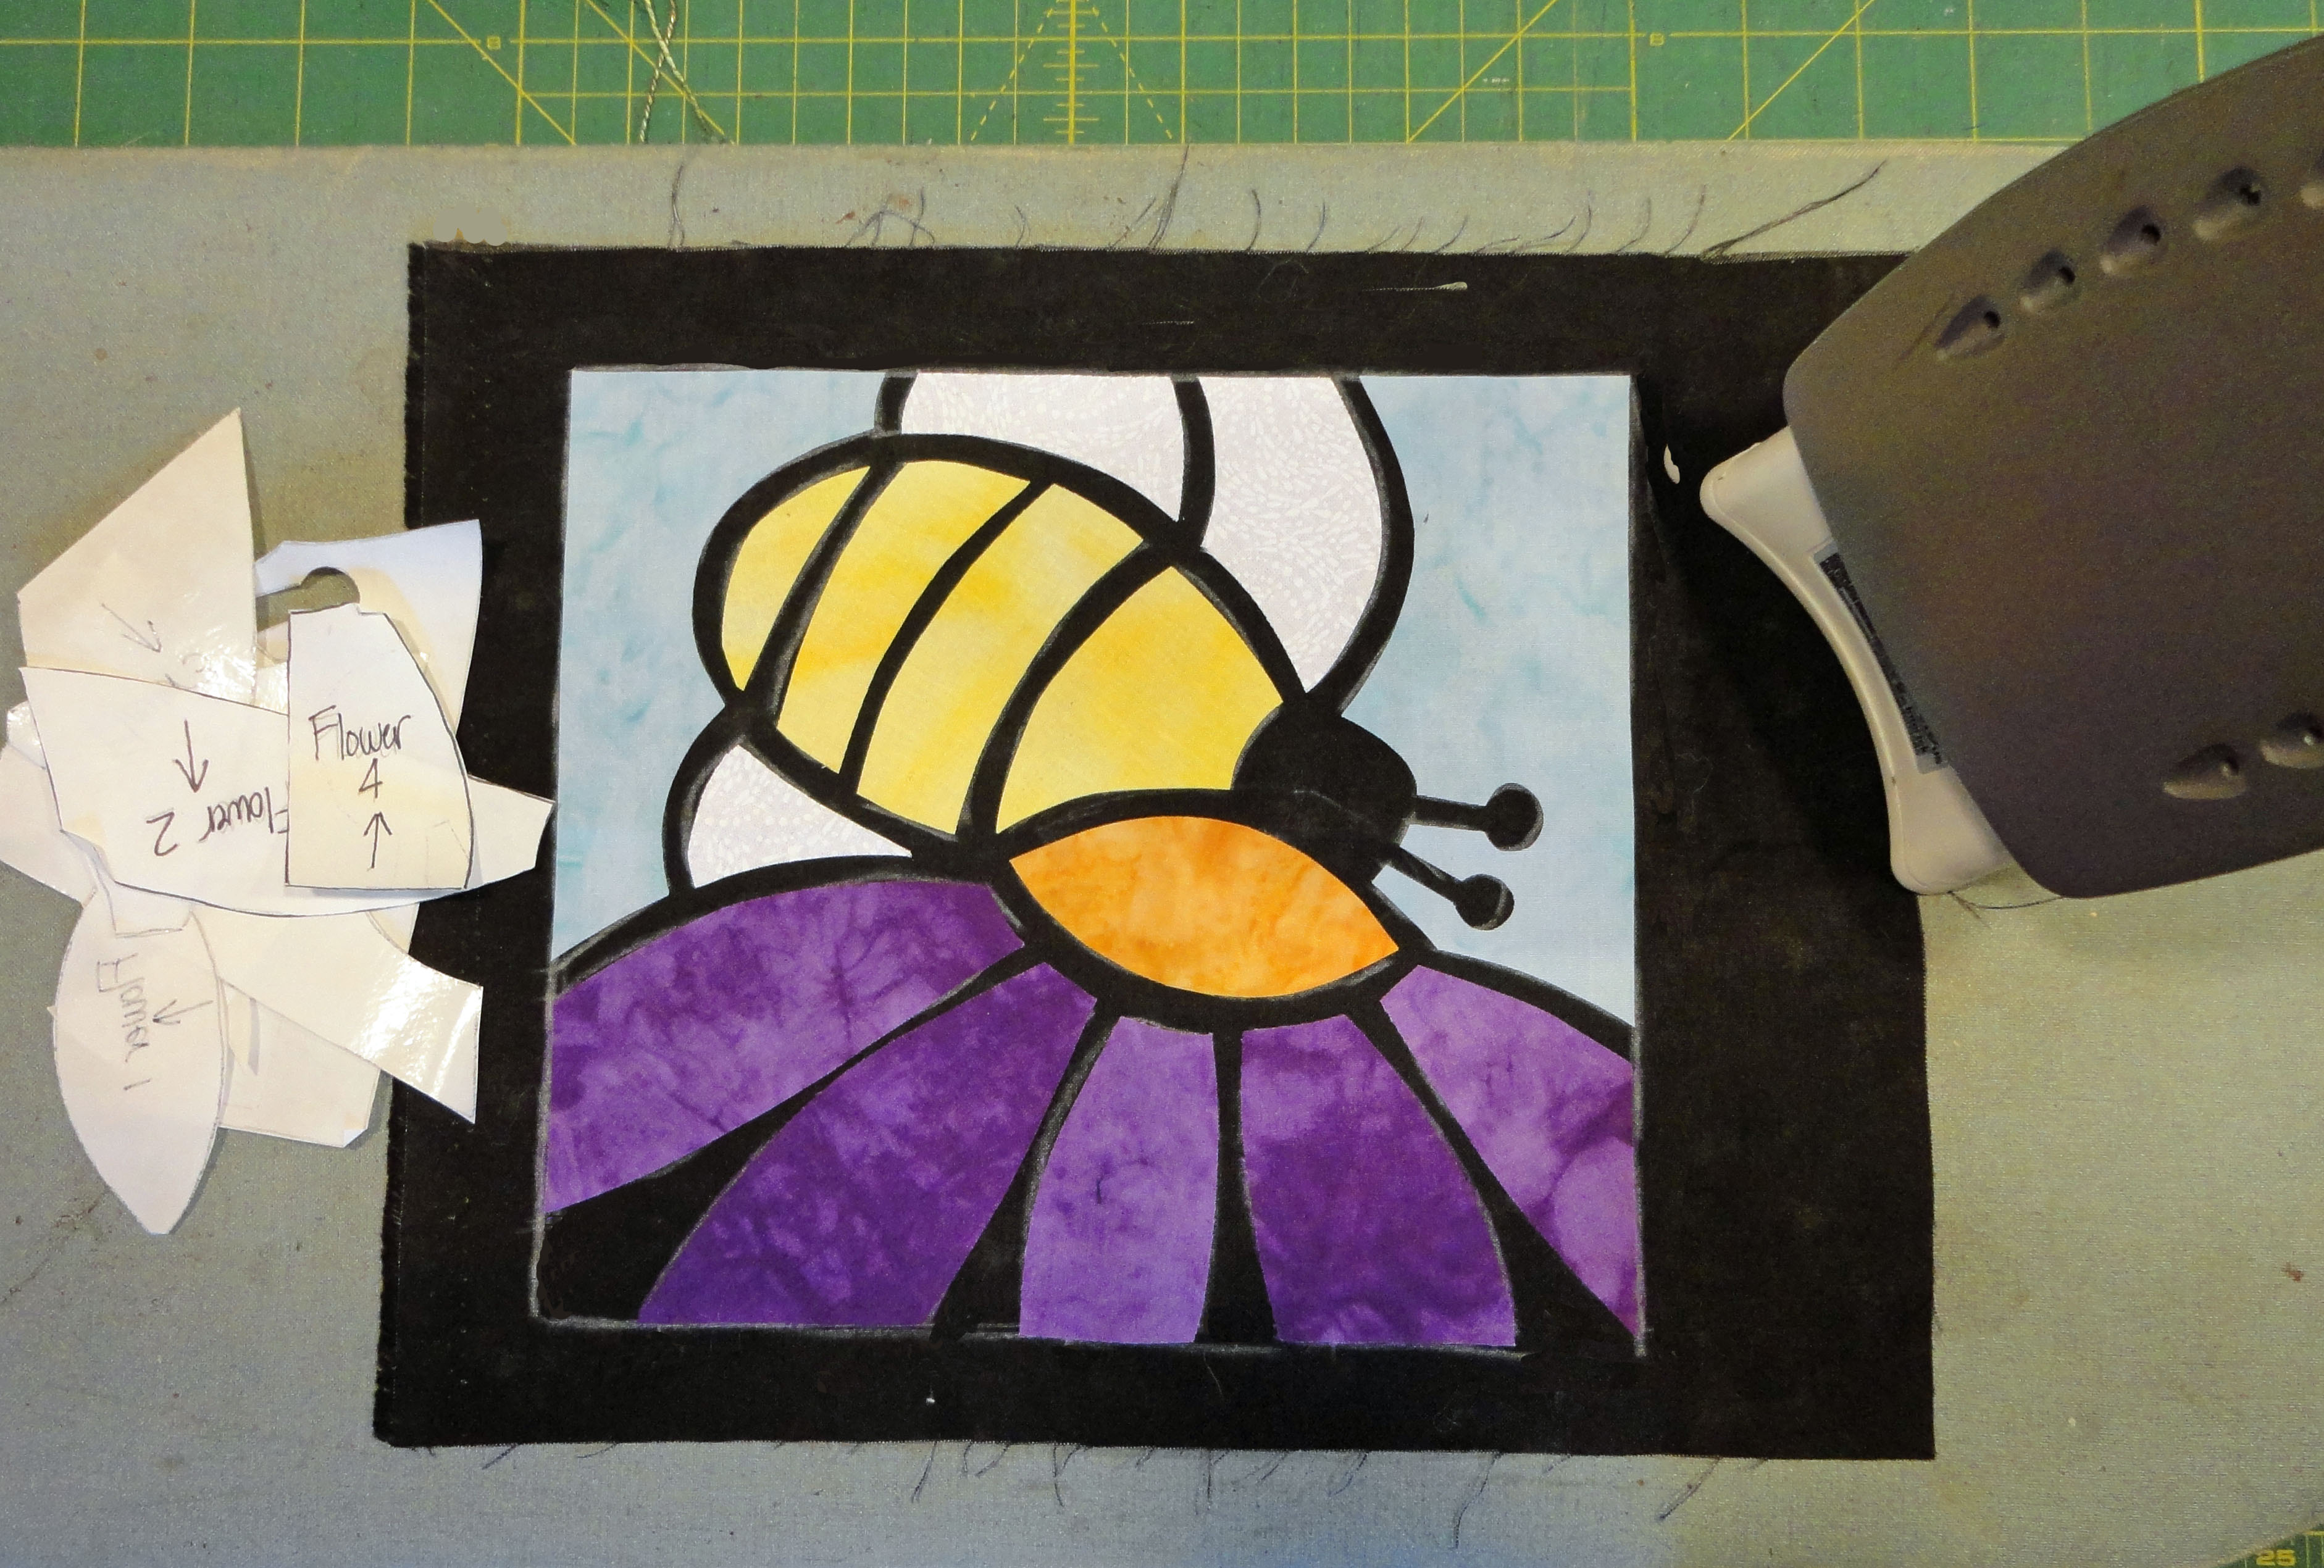
When all the pieces are placed, fuse them in place following the fusible manufacturer’s directions for heat and time. Don’t worry about chalk lines that may show-they will be erased later.
Once you are happy with all your pieces, go over the entire quilt top with the flat of the iron. Pick the iron up, place it straight down, hold it for the required time and then pick it straight up again to move to the next area. If you move the iron around on the top you may shift things or lift a corner and get the piece stuck to your iron.
Want to give it a try? Contact me for the drawing- I will be happy to send it to you as a PDF file!
Now what? Finishing…..
Once everything is ironed down you can decide how you want to stitch it.
Some like to stitch all the pieces down at this point using a blanket, zig zag or satin stitch. This will finish the edges and keep the applique from fraying. I skip this step and go directly to the quilting part. (Wall hangings do not see a lot of wear and tear and if there is the occasional loose thread, I give it a slight trim.)
I layer the top, batt and back and simply outline all the shapes with my free-motion foot and a coordinating thread colour. Stained glass quilts that have large shapes with gently curving lines can be stitched with a walking foot if you prefer. Use a straight stitch and if you have already finished the edges, lengthen your stitch. Once I have completed my stitching, I use a damp cloth or chalk eraser to remove any chalk lines that still show.
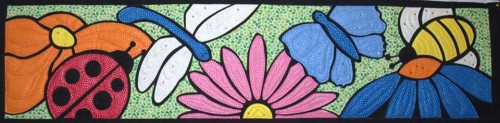
2014 “Row by Row” Shop Hop Quilted Row showing outline stitching/quilting. The bee in this quilt is flying in the opposite direction!
Hope you found this tutorial helpful, let me know!
This tutorial is very helpful. It reinforces what the pattern instructs. I’m new to quilting and I think I can do this. I’m assuming that black is probably the best colour for the backing? I’m hoping I can find all the Northcott Sandscapes fabric i need from my local quilting shop. Thanks again for this tutorial.
Denice, I use a plain black cotton like Northcott 9000 or a Bella Solid for the foundation (I find the “batik” cotton a little hard to see through). if you are having trouble sourcing the fabrics let me know and I will try to locate them. They are selling out fast and cannot be re-ordered by shops anymore. Send me a picture! Joni